Adjustment of ram
After prolonged use of the press brake, the ram guide rail may become worn or loose due to the ram’s continuous reciprocation. This is evident in significant shaking of the ram during movement and poor accuracy when bending sheet metal.
In such a scenario, the clearance of the ram guide rail should be adjusted.
Loosening of the guide rail may result in the ram vibrating excessively during operation, resulting in poor bending accuracy of the workpiece.
Guide rail adjustment method:
- Position the ram guide rail in the middle of the guide rail.
- Loosen the lock nut and tighten all the adjusting screws with an Allen wrench. Slightly loosen the adjusting screws and retighten the lock nut.
- Use a feeler gauge to measure the gap between the body’s guide rail and the ram guide rail to ensure that the maximum gap before and after the upper and lower positions of the guide rail does not exceed 0.03mm. Under the diagnostic state, the ram should slide automatically. If it fails to do so, the guide rail gap is too tight and must be loosened slightly until the gap is appropriately adjusted.
- Run the machine and observe the ram’s operation.
Parallelism adjustment of the backgauge beam
After the press brake has been running for a while, it is necessary to check the parallelism of the X-axis beam with respect to the center of the lower die.
If it is observed that the same stop finger is used for positioning, and the folded workpiece’s size differs when the stop finger is positioned differently on the left and right sides of the lower die, the parallelism of the rear stop beam to the center of the lower die needs to be adjusted.
Parallelism fine adjustment method:
- Measure the specific value of the deviation of the rear retaining beam’s parallelism to the center of the lower die.
- Use a dial indicator to touch the end with a large distance from the center of the die to the lower die, so that the dial indicator’s reading is higher than the adjustment amount, and record the value indicated on the dial indicator.
- Loosen the lock nut, adjust the position of the cross beam forward by fine-tuning the Allen screw, and observe the dial indicator during the adjustment process to ensure that it conforms to the predetermined deviation value.
- Tighten the lock nut.
- Run the press brake to verify the adjusted accuracy, and the parallelism between the beam and the lower die center should be ≤ 0.1mm.
Note:
This adjustment method is suitable for parallelism deviations between the rear retaining material and the lower die center of less than 0.4mm.
If the deviation is too large, loosen the timing belt on the X-axis and adjust the position of one end of the X-axis cross beam’s front and rear by rotating any one of the ball screws until the X-axis cross beam is parallel to the center of the lower die.
If the error is small, it can be corrected by fine adjustment.
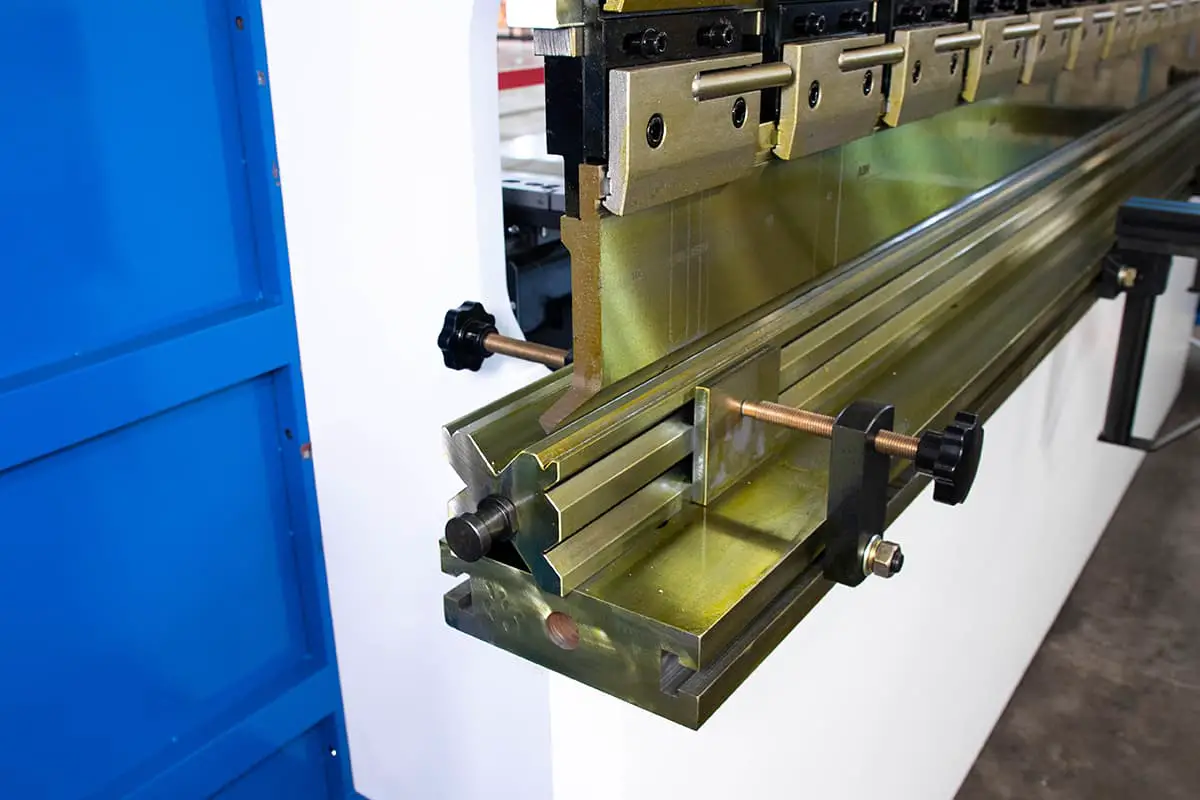
Rear stop finger adjustment
When bending a workpiece, if there is a deviation in the size of the two stop fingers, first check the parallelism of the rear stop beam.
If there is no problem with the parallelism, adjust the rear stop finger using the following method:
(1) Measure the positioning deviation of the two rear stop fingers.
(2) Use a dial indicator to touch the end of the baffle plate of the adjusted rear stop finger, and the reading on the dial indicator should be greater than the deviation value.
(3) Loosen the two M10×30 socket head cap screws on the baffle seat to enable the baffle seat to move.
(4) Adjust the M8 adjusting screw to move the rear baffle seat and observe the value displayed on the dial indicator to ensure that it conforms to the measured deviation.
(5) Tighten the two M10×30 hexagon socket screws on the baffle seat, and ensure that the dial indicator’s reading remains unchanged during the tightening process.
(6) Run the press brake, try bending the workpiece, and check whether the precision of the rear stop finger after adjustment meets the deviation requirements. If the requirements are not met, repeat the process above.
X-axis synchronous belt adjustment
The rear retaining beam is driven by the X-axis servo motor to rotate the left and right lead screws synchronously through the synchronous pulley and synchronous belt, enabling the front and rear movement of the rear retaining beam and rear retaining finger.
After prolonged use of the press brake, there may be slackness in the rear retaining synchronous belt. This is indicated by the synchronous belt’s excessive swing range during operation, and a too-loose synchronous belt can affect the accuracy of the X-axis.
Press brake operators should regularly check the tightness of the synchronous belt. If the synchronous belt is too loose, the tensioning wheel of the synchronous belt should be readjusted to achieve a moderate level of tension.
The tension force should be appropriately adjusted.
If the parallelism of the rear retaining beam exceeds 0.4mm, the position between the synchronous belt and the synchronous wheel of the right lead screw needs to be adjusted. Each tooth adjusted between the synchronous belt and the synchronous wheel will move the lead screw 0.71mm in the X-direction.
Timing belt tension adjustment method
- Loosen the locking nut of the tensioning wheel.
- Move the tensioning pulley upward to ensure the appropriate tightness of the belt.
- Tighten the locking nut of the tensioning wheel.