After unpacking, the user should check that the machine matches the packing list and pay attention to ensure that:
a. The machine tool was not damaged during handling. b. No machine parts are missing. c. The machine and parts are intact.
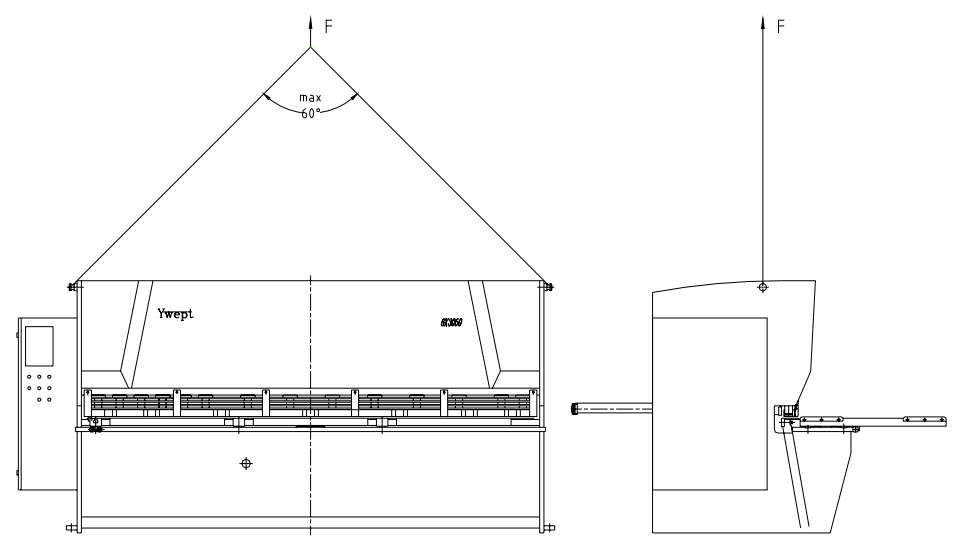
Lifting of guillotine shear
When lifting the machine, appropriate lifting equipment and steel wire rope must be selected according to the weight of the machine, otherwise unexpected safety accidents may occur.
There is a lifting bolt on the upper part of the shearing machine. When lifting, the lifting wire rope must be padded with soft objects to prevent damage to the paint (see the figure below).
Attention:
- The center of gravity of the machine is high, so be careful to prevent tipping.
- The machine should not be lifted by the oil tank, tool holder, oil cylinder, etc., but must be lifted by the lifting bolt.
- During the transportation of the machine to the intended location, appropriate lifting equipment with the lifting load capacity must be used.
- If there is no suitable lifting equipment, the lifting chain can be used. At the same time, be attentive to the proper specification and use method of the load capacity of the chain.
- Do not use lifting ropes for lifting.
Installation of guillotine shear
The installation accuracy of the guillotine shear will directly affect the machine’s service performance, so it must be installed by professionals (or personnel sent by the manufacturer).
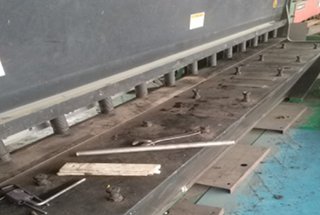
The machine should be installed on a stable and hard foundation, and the working area’s ground should be covered with a thick concrete layer, as shown in the foundation drawing, and leveled (maximum flatness of 2mm/m).
Fifteen days before installation, the user can dig the foundation, pour the machine base, reserve four anchor bolt installation holes, and pay attention to placing the four sizing blocks in the specified position.
After the foundation is set, install the anchor screws, and then perform secondary grouting.
After the cement has solidified, adjust the machine level through the supporting screws and backing plates, and then adjust the level of the worktable.
To adjust the level of the worktable, remove the platen with the steel ball in the middle of the worktable, place the level horizontally on the two convex machining surfaces of the worktable, and adjust the transverse level of the machine with the left and right support screws at the front of the machine.
Then place the level vertically and adjust the longitudinal level of the machine with the left and right support screws at the back of the machine.
The horizontal and longitudinal levels should be controlled within 1000:0.2mm.
Attention:
- The machine should be accessible from all sides, leaving enough space for various maintenance operations and adjustments.
- When the machine is suspended and ready to be installed, please insert the anchor bolt. The horizontal adjustment screw should be oiled and screwed to the bottom to facilitate installation and only need to be adjusted downward.
- Due to the different degrees of foundation looseness, the level of the machine should be rechecked after 30-50 hours of use.
- After the horizontal adjustment of the machine, before using it, please recalibrate the blade clearance uniformity according to the method described.
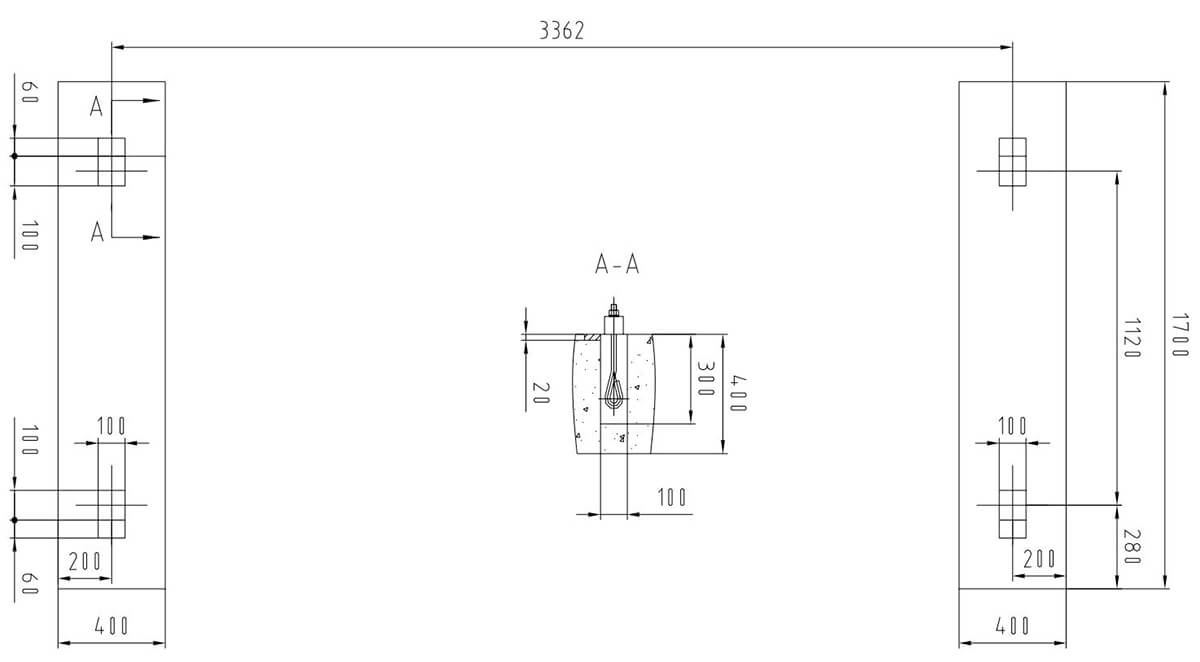
Technical Requirements:
- Four pieces of steel plates with dimensions of 100×60×δ20, provided by the purchaser, should be embedded in the foundation. The plane of the steel plate should be slightly higher than the ground, as shown in the figure above.
- After the foundation is completely solidified, the machine can be installed, and then the anchor bolts can be installed for secondary grouting.
- After the secondary grouting is completely solidified, adjust the level of the machine and carry out various commissioning.