Have you ever wondered why precision is paramount when working with stainless steel plates? Understanding thickness tolerance is crucial for ensuring the integrity and functionality of your projects. This article dives into the specifics of thickness tolerances for stainless steel plates, covering standards from different countries and their implications for manufacturing processes. By the end, you’ll know how to select the right tolerance levels for your needs, ensuring both quality and cost-effectiveness.
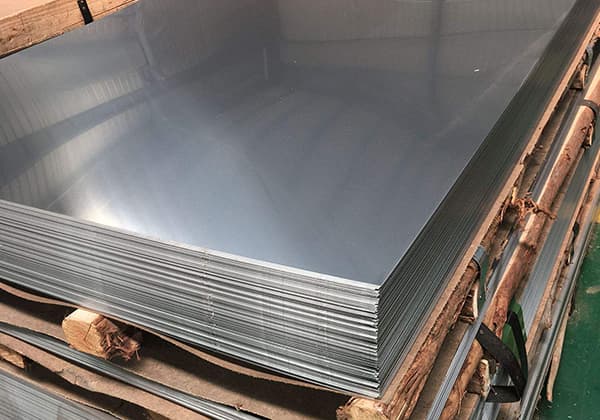
1. Allowed Thickness Deviation for Thick Steel Plate
Unit: Millimeters
| Nominal Thickness | Nominal Width | |||
| >1000~≤1500 | >1500~≤2000 | |||
| Regular Precision | Higher Precision | Regular Precision | Higher Precision | |
| >3.0~≤4.0 | ±0.31 | ±0.28 | ±0.33 | ±0.31 |
| >4.0~≤5.0 | ±0.33 | ±0.30 | ±0.36 | ±0.34 |
| >5.0~≤6.0 | ±0.36 | ±0.33 | ±0.40 | ±0.37 |
| >6.0~≤8.0 | ±0.40 | ±0.36 | ±0.44 | ±0.40 |
| >8.0~≤10.0 | ±0.44 | ±0.40 | ±0.48 | ±0.43 |
| >10.0~≤13.0 | ±0.48 | ±0.44 | ±0.52 | ±0.47 |
| >13.0~≤25.0 | ±0.53 | ±0.48 | ±0.57 | ±0.52 |
| >25.0~≤30.0 | ±0.56 | ±0.51 | ±0.60 | ±0.55 |
| >30.0~≤34.0 | ±0.60 | ±0.55 | ±0.65 | ±0.60 |
| >34.0~≤40.0 | ±0.70 | ±0.65 | ±0.70 | ±0.65 |
| >40.0~≤50.0 | ±0.80 | ±0.75 | ±0.85 | ±0.80 |
| >50.0~≤60.0 | ±0.95 | ±0.90 | ±1.00 | ±0.95 |
| >60.0~≤80.0 | ±0.95 | ±0.90 | ±1.3 | ±1.25 |
| >80.0~≤100.0 | ±1.0 | ±0.95 | ±1.5 | ±1.45 |
| >100.0~≤150.0 | ±1.10 | ±1.05 | ±1.7 | ±1.65 |
| >150.0~≤200.0 | ±1.2 | ±1.15 | ±2.0 | ±1.95 |
2. Allowed Thickness Deviation for Cut-to-length Plate and Steel Strip
| Nominal Thickness | Nominal Width | |||||
| ≤1200 | >1200~≤1500 | >1500~≤1800 | ||||
| Regular Precision | Higher Precision | Regular Precision | Higher Precision | Regular Precision | Higher Precision | |
| >2.0~≤2.5 | ±0.22 | ±0.20 | ±0.25 | ±0.23 | ±0.29 | ±0.27 |
| >2.5~≤3.0 | ±0.25 | ±0.23 | ±0.28 | ±0.26 | ±0.31 | ±0.28 |
| >3.0~≤4.0 | ±0.28 | ±0.26 | ±0.31 | ±0.28 | ±0.33 | ±0.31 |
| >4.0~≤5.0 | ±0.31 | ±0.28 | ±0.33 | ±0.30 | ±0.36 | ±0.33 |
| >5.0~≤6.0 | ±0.33 | ±0.31 | ±0.36 | ±0.33 | ±0.38 | ±0.35 |
| >6.0~≤8.0 | ±0.38 | ±0.35 | ±0.39 | ±0.36 | ±0.40 | ±0.37 |
| >8.0~≤10.0 | ±0.42 | ±0.39 | ±0.43 | ±0.40 | ±0.45 | ±0.41 |
| >10.~≤13.0 | ±0.45 | ±0.42 | ±0.47 | ±0.44 | ±0.49 | ±0.45 |
The steel currently purchased is in accordance with the GB4237-92 standard.
1. Allowed Tolerance for Thick Steel Plate
| Nominal Thickness | Negative Deviation | Allowed Thickness Deviation for the Following Widths | ||||
| >1200~1500 | >1500~1700 | >1700~1800 | >1800~2000 | >2000~2300 | ||
| >13~25 | 0.8 | 0.2 | 0.3 | 0.4 | 0.6 | 0.8 |
| >25~30 | 0.9 | 0.2 | 0.3 | 0.4 | 0.6 | 0.8 |
| >30~34 | 1 | 0.3 | 0.3 | 0.4 | 0.6 | 0.8 |
| >34~40 | 1.1 | 0.4 | 0.5 | 0.6 | 0.7 | 0.9 |
| >40~50 | 1.2 | 0.5 | 0.6 | 0.7 | 0.8 | 1 |
| >50~60 | 1.3 | 0.7 | 0.8 | 0.8 | 1 | 1.1 |
| >60~80 | 1.8 | – | 1 | 1 | 1 | 1 |
| >80~100 | 2 | – | 1.2 | 1.2 | 1.2 | 1.2 |
| >100~150 | 2.2 | – | 1.3 | 1.3 | 1.3 | 1.4 |
| >150~200 | 2.6 | – | 1.5 | 1.5 | 1.5 | 1.6 |
2. Allowed Deviation for Steel Plate and Steel Strip
| Nominal Thickness | Allowed Thickness Deviation for the Following Widths | |||||
| (Steel Plate and Steel Strip) | 600~750 | >750~1000 | >1000~1500 | |||
| Higher Precision | Regular Precision | Higher Precision | Regular Precision | Higher Precision | Regular Precision | |
| >0.35~0.50 | ±0.05 | ±0.07 | ±0.05 | ±0.07 | — | — |
| >0.50~0.60 | ±0.06 | ±0.08 | ±0.06 | ±0.08 | — | — |
| >0.60~0.75 | ±0.07 | ±0.09 | ±0.07 | ±0.09 | — | — |
| >0.75~0.90 | ±0.08 | ±0.10 | ±0.08 | ±0.10 | — | — |
| >0.90~1.10 | ±0.09 | ±0.11 | ±0.09 | ±0.12 | — | — |
| >1.10~1.20 | ±0.10 | ±0.12 | ±0.11 | ±0.13 | ±0.11 | ±0.15 |
| >1.20~1.30 | ±0.11 | ±0.13 | ±0.12 | ±0.14 | ±0.12 | ±0.15 |
| >1.30~1.40 | ±0.11 | ±0.14 | ±0.12 | ±0.15 | ±0.12 | ±0.18 |
| >1.40~1.60 | ±0.12 | ±0.15 | ±0.13 | ±0.15 | ±0.13 | ±0.18 |
| >1.60~1.80 | ±0.13 | ±0.15 | ±0.14 | ±0.17 | ±0.14 | ±0.18 |
| >1.80~2.00 | ±0.14 | ±0.16 | ±0.15 | ±0.17 | ±0.16 | ±0.18 |
| >2.00~2.20 | ±0.15 | ±0.17 | ±0.16 | ±0.18 | ±0.17 | ±0.19 |
| >2.20~2.50 | ±0.16 | ±0.18 | ±0.17 | ±0.19 | ±0.185 | ±0.20 |
| >2.50~3.00 | ±0.17 | ±0.19 | ±0.18 | ±0.20 | ±0.19 | ±0.21 |
| >3.00~3.50 | ±0.18 | ±0.20 | ±0.19 | ±0.21 | ±0.20 | ±0.22 |
| >3.50~4.00 | ±0.21 | ±0.23 | ±0.22 | ±0.26 | ±0.24 | ±0.28 |
| >4.00~5.50 | -0.333333333 | -0.5 | -0.5 | -3 | -0.25 | -0.6 |
| >5.00~7.5 | -0.25 | -0.4 | -0.2 | -0.333333333 | -0.2 | -0.416666667 |
| >7.50~10.0 | -0.142857143 | -0.25 | -0.142857143 | -0.25 | -0.285714286 | -0.375 |
| >10.0~13.0 | -0.142857143 | -0.25 | -0.142857143 | -0.25 | -0.285714286 | -0.375 |
Allowed Thickness Deviation for Steel Plate and Steel Strip:
| Nominal Thickness | Nominal Width | ||
| ≤1000 | ≥1000~1≤300 | ≥1300~≤2100 | |
| ≥0.3-0.5 | ±0.04 | ±0.45 | — |
| ≥0.5-0.6 | ±0.045 | ±0.05 | — |
| ≥0.6-0.8 | ±0.05 | ±0.055 | — |
| ≥0.8-1.00 | ±0.040 | ±0.045 | |
| ≥1.00-1.20 | ±0.055 | ±0.06 | ±0.065 |
| ≥1.20-1.50 | ±0.07 | ±0.08 | ±0.09 |
| ≥1.50-2.00 | ±0.08 | ±0.09 | ±0.10 |
| ≥2.00-2.50 | ±0.09 | ±0.10 | ±0.11 |
| ≥25.0-3.00 | ±0.11 | ±0.12 | ±0.12 |
| ≥3.00-4.00 | ±0.13 | ±0.14 | ±0.14 |
| ≥4.00-5.00 | ±0.14 | ±0.15 | ±0.15 |
| ≥5.00-6.50 | ±0.15 | ±0.16 | ±0.16 |
| ≥6.50-8.00 | ±0.16 | ±0.17 | ±0.17 |
GB3280-1992 Cold Rolled Stainless Steel Plate and Steel Strip
| Nominal Thickness | Nominal Width | |||
| A-Level Precision | B-Level Precision | |||
| ≤1500 | >1500~≤2000 | ≤1500 | >1500~≤2000 | |
| >0.2~0.5 | ±0.04 | — | ±0.05 | — |
| >0.5~0.65 | ±0.05 | — | ±0.06 | — |
| >0.65~0.90 | ±0.06 | — | ±0.07 | — |
| >0.90~1.10 | ±0.07 | ±0.09 | ±0.09 | ±0.11 |
| >1.10~1.20 | ±0.09 | ±0.10 | ±0.10 | ±0.12 |
| >1.20~1.40 | ±0.10 | ±0.12 | ±0.11 | ±0.14 |
| >1.40~1.50 | ±0.11 | ±0.13 | ±0.12 | ±0.15 |
| >1.50~1.80 | ±0.12 | ±0.14 | ±0.14 | ±0.16 |
| >1.80~2.00 | ±0.13 | ±0.15 | ±0.15 | ±0.17 |
| >2.00~2.50 | ±0.14 | ±0.17 | ±0.16 | ±0.18 |
| >2.50~3.00 | ±0.16 | ±0.19 | ±0.18 | ±0.20 |
| >3.00~3.50 | ±0.18 | ±0.20 | ±0.20 | ±0.21 |
| >3.50~4.00 | ±0.19 | ±0.21 | ±0.22 | ±0.24 |
| >4.00~5.00 | ±0.20 | ±0.22 | ±0.23 | ±0.25 |
Unit: Millimeters
| Nominal Thickness | Steel Plate Width | |||
| 1000~1250 | 1250~1600 | 1600~2000 | 2000~2500 | |
| 2~2.5 | ±0.25 | ±0.30 | — | — |
| 2.5~3.15 | ±0.30 | ±0.35 | ±0.40 | — |
| 3.15~4.0 | ±0.35 | ±0.40 | ±0.45 | — |
| 4.0~5.0 | ±0.40 | ±0.45 | ±0.50 | ±0.60 |
| 5.0~6.0 | ±0.50 | ±0.55 | ±0.60 | ±0.70 |
| 6.0~8.0 | ±0.60 | ±0.65 | ±0.65 | ±0.75 |
| 8.0~10.0 | ±0.65 | ±0.65 | ±0.65 | ±0.80 |
| 10.0~16.0 | ±0.70 | ±0.70 | ±0.70 | ±0.85 |
| 16.0~25.0 | ±0.80 | ±0.80 | ±0.80 | ±0.95 |
| 25.0~40.0 | ±0.90 | ±0.90 | ±0.90 | ±1.10 |
| 40.0~63.0 | ±1.0 | ±1.0 | ±1.20 | ±1.20 |
| 63.0~100 | ±1.10 | ±1.20 | ±1.30 | ±1.30 |
| 100~160 | ±1.30 | ±1.30 | ±1.40 | ±1.40 |
| 160~200 | ±1.60 | ±1.60 | ±1.70 | ±1.70 |
Unit: Millimeters
| Nominal Thickness | Steel Plate Width | |
| ~1250 | 1250~1600 | |
| 0.16~0.25 | ±0.03 | — |
| 0.25~0.30 | ±0.04 | — |
| 0.30~0.60 | ±0.05 | ±0.08 |
| 0.60~0.80 | ±0.07 | ±0.09 |
| 0.80~1.00 | ±0.09 | ±0.10 |
| 1.00~1.25 | ±0.10 | ±0.12 |
| 1.25~1.60 | ±0.12 | ±0.15 |
| 1.60~2.00 | ±0.15 | ±0.17 |
| 2.00~2.50 | ±0.17 | ±0.20 |
| 2.50~3.15 | ±0.22 | ±0.25 |
| 3.15~4.00 | ±025 | ±0.30 |
| 4.00~5.00 | ±0.35 | ±0.40 |
| 5.00~6.00 | ±0.40 | ±0.45 |
| 6.00~8.00 | ±0.50 | ±0.50 |
| 8.00~10.00 | ±0.60 | ±0.60 |
| 10.0~16.00 | ±0.70 | ±0.70 |
| 16.0~25.0 | ±0.80 | ±0.80 |
1. Allowed Thickness Deviation for ASTM A480 Hot Rolled Wide Coil and Cut-to-Length Plate
| Thickness A,in.[mm] | Allowed Deviation, for Specified Width(w),±,in.[mm] | |
| w≤60[1525] | w>60[1525] | |
| 0.072[1.83] | 0.006[0.15] | 0.009[0.22] |
| >0.072[1.83]-0.083[2.11] | 0.007[0.18] | 0.010[0.25] |
| >0.083[2.11]-0.098[2.49] | 0.008[0.20] | 0.011[0.27] |
| >0.098[2.49]-0.114[2.90] | 0.009[0.23] | 0.012[0.30] |
| >0.114[2.90]-0.130[3.30] | 0.011[0.27] | 0.013[0.33] |
| >0.130[3.30]-0.145[3.68] | 0.012[0.30] | 0.013[0.33] |
| >0.145[3.68]-0.1875[4.76] | 0.013[0.33] | 0.014[0.35] |
| >0.1875[4.76]-0.250[6.35] | -0.010[0.25],+0.020[0.50] | -0.010[0.25],+0.020[0.50] |
| >0.250[6.35]-0.3125[7.94] | -0.010[0.25],+0.022[0.55] | -0.010[0.25],+0.022[0.55] |
| >0.3125[7.94] | -0.010[0.25],+0.030[0.75] | -0.010[0.25],+0.030[0.75] |
| The thickness of A thin plate is measured no less than 3/8 inch [9.52 mm] from the edge. | ||
2. Allowed Thickness Deviation for ASTM A480 Cold Rolled Wide Coil and Cut-to-Length Plate
| Thickness A、B,in.[mm] | Allowed Deviation, for Specified Width(w),±,in.[mm] | ||
| W≤40[1000] | 40[1000]<w≤50[1300] | 50[1300]<w≤84[2100] | |
| 0.012[0.30] | 0.001[0.030] | – | – |
| 0.016[0.40] | 0.0015[0.04] | 0.0015[0.04] | – |
| 0.020[0.50] | 0.0015[0.04] | 0.0015[0.04] | – |
| 0.024[0.60] | 0.002[0.05] | 0.002[0.05] | – |
| 0.032[0.80] | 0.002[0.05] | 0.002[0.05] | – |
| 0.040[1.00] | 0.0025[0.06] | 0.0025[0.06] | 0.003[0.08] |
| 0.047[1.20] | 0.003[0.08] | 0.003[0.08] | 0.003[0.08] |
| 0.059[1.50] | 0.003[0.08] | 0.003[0.08] | 0.004[0.10] |
| 0.079[2.00] | 0.004[0.10] | 0.004[0.10] | 0.0045[0.11] |
| 0.098[2.50] | 0.004[0.10] | 0.004[0.10] | 0.005[0.13] |
| 0.118[3.00] | 0.005[0.13] | 0.005[0.13] | 0.006[0.15] |
| 0.157[4.00] | 0.007[0.17] | 0.007[0.17] | 0.007[0.17] |
| 0.197[5.00] | 0.007[0.17] | 0.007[0.17] | 0.0075[0.19] |
| 0.236[6.00] | 0.007[0.17] | 0.008[0.20] | 0.009[0.23] |
| 0.3125[8.00] | 0.007[0.17] | 0.009[0.23] | 0.010[0.25] |
| The thickness of A thin plate is measured at a point no less than 3/8 inch [9.52 mm] from the edge. | |||
| B When outside the specified thickness, the deviation of the next thicker size is used. | |||
3. Allowed Thickness Deviation for ASTM A480 Hot Rolled Medium Plate A, B
| Thickness (t),in.[mm] | Width (w),in.[mm] | |||
| w≤84[2134] | 84[2134]<w≤120[3048] | 120[3048]<w≤144[3658] | w>144[3658] | |
| Positive Thickness Deviation C,in.[mm] | ||||
| t<3/16[4.76] | 0.055[1.35] | 0.070[1.78] | – | – |
| 3/16[4.76]≤t<3/8[9.52] | 0.045[1.14] | 0.050[1.27] | 0.085[2.16] | – |
| 3/8[9.52]≤t<3/4[19.05] | 0.055[1.40] | 0.060[1.52] | 0.085[2.16] | 0.090[2.29] |
| 3/4[19.05]≤t<1[25.40] | 0.060[1.52] | 0.065[1.65] | 0.085[2.16] | 0.100[2.54] |
| 1[25.40]≤t<2[50.80] | 0.070[1.78] | 0.075[1.90] | 0.095[2.41] | 0.115[2.92] |
| 2[50.80]≤t<3[76.20] | 0.125[3.20] | 0.150[3.80] | 0.175[4.45] | 0.200[5.08] |
| 3[76.20]≤t<4[101.6] | 0.150[3.81] | 0.160[4.06] | 0.200[5.08] | 0.225[5.72] |
| 4[101.6]≤t<6[152.4] | 0.180[4.57] | 0.200[5.08] | 0.335[8.50] | 0.355[9.02] |
| 6[152.4]≤t<8[203.2] | 0.235[6.00] | 0.255[6.48] | 0.355[9.02] | 0.435[11.0] |
| 8[203.2]≤t<10[254.0] | 0.315[8.00] | 0.335[8.50] | 0.435[11.0] | 0.550[14.0] |
| A Thickness is measured along the longitudinal edge not less than 3/8 in. [9.52 mm], but no greater than 3 in. [76.20 mm] from the edge. | ||||
| B For steel plates with thickness less than or equal to 10 in. [254.0 mm], the negative deviation is 0.010 in. [0.25 mm]. | ||||
| C For round shapes, the thickness tolerance is executed within the table’s width range for its diameter; for irregular steel plates, the positive tolerance is executed within the table’s width range for its maximum width. | ||||
