Ever wondered how to perfect the art of using a grooving tool? This article covers the 10 essential tips to optimize your grooving process, from selecting the right tool and understanding groove types to managing feed rates and cutting speeds. By the end, you’ll know how to enhance tool longevity, achieve precise cuts, and improve overall efficiency in your machining tasks. Dive in to learn practical insights that will elevate your grooving technique and ensure flawless results every time.
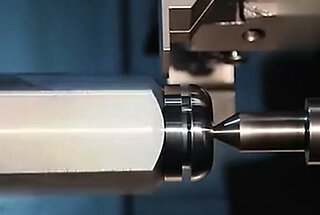
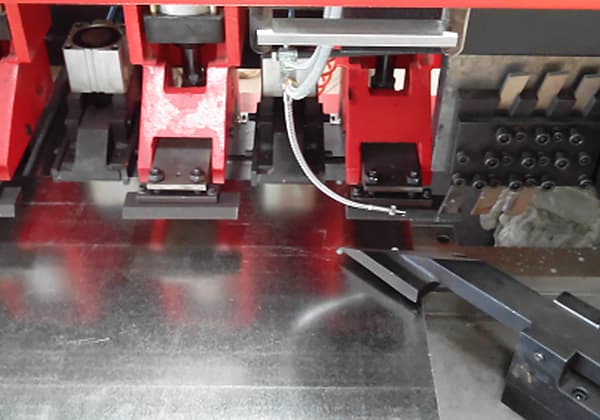
Grooving is a crucial step in the turning process, and its chip formation and discharge characteristics make it distinct in nearly every aspect.
Innovative insert designs and coatings can enhance the efficiency and outcome of grooving, but there are several machining techniques that must be mastered to carry out this process effectively.
This article presents 10 key considerations for utilizing a grooving tool.
1. Understand the groove type
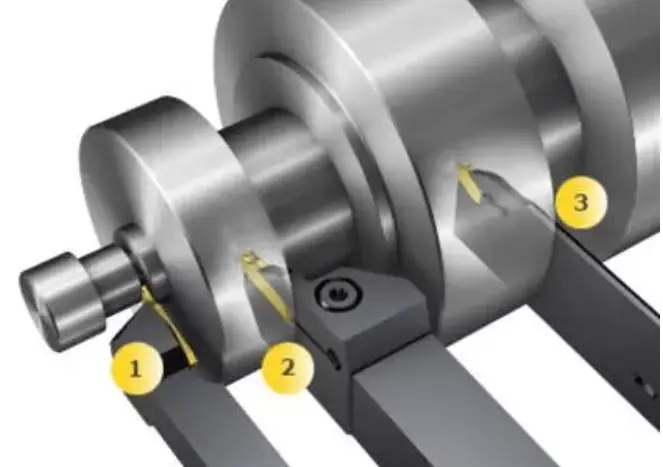
It is crucial to comprehend the three main types of grooves, which are: outer groove, inner hole groove, and end face groove.
Outer grooves are the simplest to process as the force of gravity and the use of coolant can aid in chip removal. The operator can directly observe the machining of outer grooves, making it relatively easy to monitor the quality of the machining process. However, it is essential to avoid potential design or clamping issues with the workpiece. To achieve optimal cutting results, it is best to keep the tip of the grooving tool slightly below the centerline.
Internal hole grooving resembles external diameter grooving, except that coolant application and chip removal can be more challenging. The best results can be achieved when the tip position is slightly above the centerline for internal grooving.
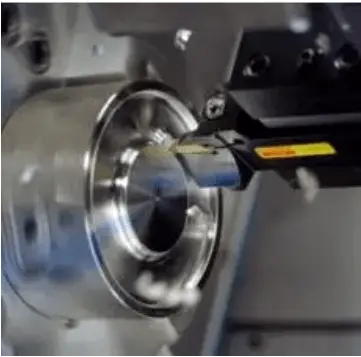
For end face grooving, the tool must have the ability to move in the axial direction, and the radius of the tool’s flank must match the radius of the machined surface. The cutting edge position of the grooving tool should be slightly above the centerline.
Outer grooving
Inner hole grooving
End face grooving
2. Processing machine tools and applications
In the grooving process, the design type and technical specifications of the machine tool are also critical factors to consider. Some of the main performance requirements for machine tools include:
Having sufficient power to ensure that the tool operates within the correct speed range without stalling or vibrating;
Having high rigidity to complete the required cutting without chatter;
Having a high enough coolant pressure and flow to facilitate chip removal;
Having a high level of accuracy.
Furthermore, to produce the desired groove shape and size, it is crucial to properly adjust and calibrate the machine tool.
3. Understand the material characteristics of the workpiece
Being familiar with the properties of the workpiece material, such as its tensile strength, work hardening characteristics, and toughness, is vital to comprehending the impact of the workpiece on the tool. When machining different workpiece materials, varying combinations of cutting speed, feed rate, and tool characteristics are necessary. Different workpiece materials may also necessitate specific tool geometries to manage chipping or require the use of specific coatings to enhance tool longevity.
4. Choose the right tool
The appropriate selection and utilization of tools will determine the cost-effectiveness of machining.
The grooving tool can machine the workpiece geometry in two ways:
The first is to process the entire groove shape by making a single cut;
The second is to rough out the final size of the groove by cutting in multiple stages.
Once the tool geometry has been chosen, it may be beneficial to consider a tool coating that enhances chip removal performance.
5. Form tools
When machining in large quantities, it may be advantageous to consider using forming tools.
The forming tool can cut all or most of the groove shapes in a single operation, freeing up the tool’s position and reducing the processing cycle time.
A disadvantage of non-blade forming tools is that if one of the teeth breaks or wears faster than the other teeth, the entire tool must be replaced.
It is important to control the chips generated by the tool and the machine power required for forming cutting. This must be taken into consideration.
6. Choose single point multi-function tool
The use of multi-functional tools can generate tool paths in both the axial and radial directions.
With this type of tool, not only can the groove be machined, but the diameter can also be turned, the radius and angle can be interpolated, and multi-directional turning can be performed.
Once the blade starts cutting, it moves axially from one end to the other end of the workpiece while maintaining contact with the workpiece.
By using a multi-functional tool, more time can be spent cutting the workpiece instead of changing tools or making empty stroke movements.
Multi-functional tools also help to streamline the machining process for the entire workpiece.
7. Use the correct processing sequence
Rational planning of the optimal machining sequence involves taking into account several factors, such as the change in workpiece strength before and after the groove is machined, as the strength of the workpiece decreases after the groove is machined first.
This may result in the operator using a feed rate and cutting speed that is lower than optimal to avoid chatter. However, lowering the cutting parameters can lead to longer machining times, shorter tool life, and unstable cutting performance.
Another factor to consider is whether the subsequent process will push the burrs into the previously machined grooves.
As a general guideline, it is advisable to start with the furthest point from the tool holder after the outer diameter (OD) and inner diameter (ID) turning is completed, followed by machining the grooves and other structural features.
8. The role of feeding rate and cutting speed
The feed rate and cutting speed are crucial factors in groove machining. Improper feed and cutting speeds can result in chatter, reduced tool life, and extended machining cycle times.
Several factors, including the workpiece material, tool geometry, coolant type and concentration, insert coating, and machine performance, can impact the feed and cutting speed.
To address issues caused by incorrect feed and cutting speeds, secondary machining is often required.
While there is a wealth of information available on the “optimal” feed and cutting speeds for various tools, the most relevant and practical information is typically provided by the tool manufacturer.
9. Selection of blade coating
The coating of a carbide blade can significantly enhance its lifespan.
By providing a lubricating layer between the tool and the chip, the coating also reduces machining time and enhances the surface finish of the workpiece.
Some of the commonly used coatings today include TiAlN, TiN, and TiCN. For optimal performance, it is essential to match the coating to the material being machined.
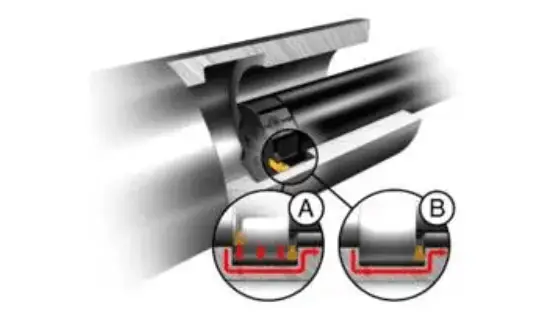
Proper application of cutting fluid involves providing enough fluid at the cutting point where the grooved insert comes into contact with the workpiece.
The cutting fluid serves two purposes: cooling the cutting area and aiding in chip removal.
Increasing the cutting fluid pressure at the cutting point is highly effective in improving chip evacuation when machining blind bore internal diameter grooves.
For the grooving of challenging materials such as those with high toughness or viscosity, high-pressure cooling offers significant benefits.
The concentration of water-soluble oil-based coolant is also crucial for trenching difficult materials.
While the typical coolant concentration range is between 3% and 5%, you can also test increasing the concentration (up to 30%) to enhance the lubricity of the coolant and provide a protective layer for the blade tip.
Lastly, you can view a demonstration video of grooving tooling by following the link below:
As the founder of MachineMFG, I have dedicated over a decade of my career to the metalworking industry. My extensive experience has allowed me to become an expert in the fields of sheet metal fabrication, machining, mechanical engineering, and machine tools for metals. I am constantly thinking, reading, and writing about these subjects, constantly striving to stay at the forefront of my field. Let my knowledge and expertise be an asset to your business.
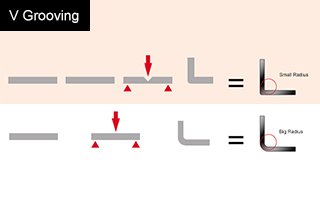
Curious about how a V-grooving machine can transform your metalworking process? This article guides you through essential steps and safety precautions for operating the machine effectively. From preparation and equipment…
Ever wondered how metal sheets achieve those precise, flawless bends? This article unveils the magic behind V-grooving machines. Learn how they transform metalworking, enhancing precision and aesthetics in industries from…
Ever wondered how to accurately calculate the unfolded length in groove bending? This guide breaks down the differences between grooved and non-grooved bending calculations, complete with practical examples for square…
Have you ever wondered how intricate metal designs in cars and airplanes come to life? This article explores the fascinating world of sheet metal bending and grooving techniques, revealing how…