The four fundamental elements influencing laser engraving are: engraving speed, laser power, engraving precision, and the material.
To achieve a certain engraving effect on a specific material, it requires the absorption of a certain level of laser energy. This energy should be considered as the laser energy absorbed by the material = laser power / engraving speed.
Put simply, to increase the laser energy absorbed by the material, one should either increase the laser power or decrease the engraving speed.
Which method to adopt depends on the material and the final engraving effect. Generally, users avoid high and low speeds as it reduces production efficiency.
Engraving efficiency is not only affected by speed, but engraving precision also has a significant impact.
From our practical experience, the difference between objects engraved at 500dpi and 600dpi is negligible to the naked eye, but the time consumed differs by around 20-30%.
Under normal circumstances, users use 500dpi to complete most tasks, and only use 600dpi or higher settings for cutting or when high-density energy is required.
Thus, the engraving material likely has the most decisive impact on the final engraving effect. New users generally have limited understanding of material characteristics and lack a deep understanding of the engraving performance of different materials, which can inevitably cause some loss to customers.
Below, I will introduce some commonly used engraving materials and their engraving performance methods for your reference:
I. Grayscale Representation
Conventional mechanical engraving cannot economically engrave points of differing sizes and therefore lacks grayscale representation.
Laser engraving, achieved through dot-matrix engraving, naturally excels in grayscale representation. Therefore, grayscale can be extensively used in engraving design.
This approach not only reduces the coloring process, saving costs, but also enriches the engraving reproduction methods, adding depth to the graphics.
When users utilize this, they first fill different grayscales within the graphic (text must be converted to graphics), select the black-and-white mode for engraving output, and can experiment with the effects of different dot sizes, with precision generally not exceeding 500dpi.
II. Engraving Materials
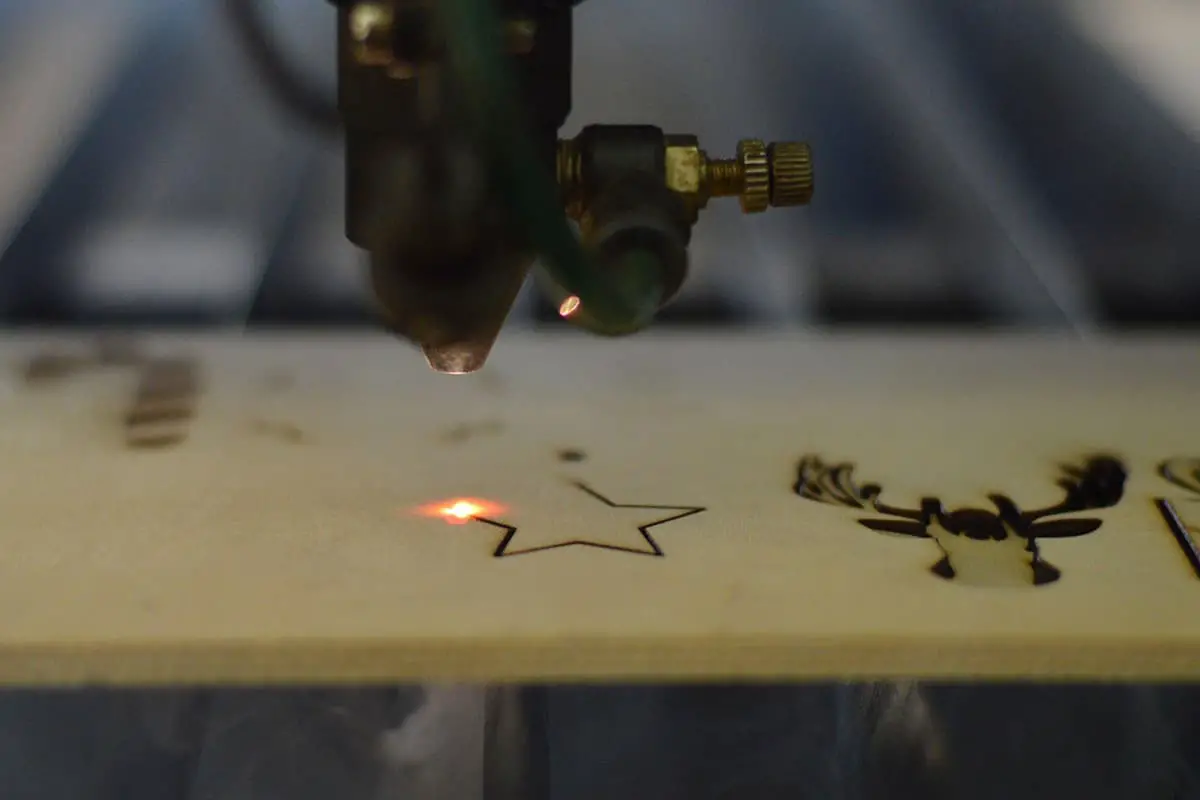
1. Wood
A. Raw Wood (Unprocessed Timber)
Wood is the most commonly used material for laser processing to date, as it is easy to engrave and cut. Light-colored woods like birch, cherry, or maple can be effectively vaporized by the laser, making them suitable for engraving.
Each type of wood has unique characteristics; some are denser, such as hardwoods, and require higher laser power for engraving or cutting.
We recommend studying the engraving characteristics of unfamiliar woods before engraving.
B. Plywood
Sometimes clients may request engraving on plywood, which is not significantly different from engraving on wood, but it’s important to avoid engraving too deeply.
The edges of cut plywood will darken like wood, with the key factor being the type of wood used in the plywood.
C. Wood Cutting
Laser engraving machines typically do not cut deeply into wood, generally less than 5mm, due to the lower power of the laser. Slowing down the cutting speed can result in wood combustion.
In specific operations, it may be worth trying to use a large objective lens and employ a repeated cutting method.
D. Coloring
Wood generally has a burnt feel after engraving, which when paired with the natural wood color, creates a primitive artistic beauty. The depth of color depends mainly on laser power and engraving speed.
However, some types of wood, usually those with softer textures, cannot change color no matter what you do (e.g., birch). Sometimes clients may request that you color the finished product, in which case acrylic paint can be used.
2. Density Overlay Panels
A. Ordinary Density Overlay Panels
This type of panel, often used for making sign backplates, consists of high-density boards covered with a thin veneer of wood grain. Lasers can engrave on this material, but the resulting pattern is uneven in color and tends to darken.
It usually needs coloring. You can typically achieve better results by learning proper design techniques and using a 0.5mm two-color board for inlay.
B. Laser-specific Density Overlay Panels
Some density boards are specifically designed for laser engraving, producing evenly colored patterns without the need for additional coloring for a good effect.
C. Cleaning
The surface of the density board can be cleaned with a damp cloth after engraving.
D. Coloring
Acrylic paint or alkyd paint can be used. During engraving, the graphic color can be set to 60% gray to create a slightly rough bottom surface, improving color adhesion.
3. Acrylic (A Type of Plexiglass)
A. Acrylic
Acrylic is the second most commonly used engraving material after wood. It is easily cut and engraved, comes in a variety of shapes and sizes, and is relatively affordable.
Plexiglass is produced in two ways: casting and extrusion. Laser engraving primarily uses cast plexiglass, as it creates a very white frost effect after engraving, providing a stark contrast to its original transparent texture.
Conversely, extruded plexiglass remains transparent after laser engraving, providing insufficient contrast. When purchasing plexiglass, insist on high-purity types with the dealer, otherwise the material may melt during the engraving or cutting process.
B. Engraving
Generally, plexiglass is engraved from the back, that is, engraved from the front and viewed from the back, giving the finished product a more three-dimensional feel.
When engraving, mirror the image first, selecting high speed and low power settings. If the power is too high during engraving, uneven stripes may appear on the bottom.
If you wish to engrave deeper, try engraving multiple times. When coloring specific parts in a back-engraved situation, engrave the coloring area deeper first, then polish it with a flame polisher before applying color.
Without this polishing step, the color viewed from the front will not be uniform.
C. Cutting
Plexiglass is relatively easy to cut. If the customer’s requirements are not high, the cut pieces can be delivered immediately after cutting, without the need for flame polishing.
However, if flame polishing is necessary, use a blowing device during cutting to improve the quality of the cut. When cutting plexiglass thicker than 8mm, switch to a larger lens.
Note: Operators should not leave during the cutting process, as there may be flames.
D. Cleaning
Use acrylic paint, as other paints may damage the smoothness of the plexiglass.
4. Dual-Color Sheets
A. Dual-Color Sheets
Dual-color sheets are a type of engineering plastic used for engraving, consisting of two or more layers of colors. The standard size is usually 600mm x 1200mm, with some brands offering a smaller size of 600mm x 900mm.
Engraved dual-color sheets are often used for various signs and name badges due to their uniform color, clear patterns, and durability.
They are broadly divided into two categories, mechanical and laser, with some mechanical sheets also suitable for laser engraving.
The characteristic of laser engraving sheets is that the surface color layer is thin (<0.1mm) and the entire sheet is somewhat thinner than the mechanical sheets (laser sheets are generally 1.3mm & 0.8mm, mechanical sheets are generally 1.5mm).
When purchasing dual-color sheets, if unsure about their suitability for laser machines, it is advisable to consult the dealer or to test a small piece first.
From our experience, if the surface color of the sheet is very thin, it can generally be laser engraved. If the surface color is thicker, consider engraving twice.
B. Engraving
If a laser sheet is used, the engraving results will be very good, with clear contrasts and edges. When using a mechanical sheet with a thin surface, the engraving effect is not much different from a laser sheet, although the edges may not be as clear upon close inspection.
It is generally not advisable to use mechanical sheets with a thicker surface, as it would require reducing the laser power and engraving repeatedly to clear the bottom, and the final result may not be very good.
On dual-color sheets with high contrast (like black and white), it is possible to design engraved grayscale images.
After a large amount of engraving, the dual-color sheet itself may deform slightly. This can be corrected by heating it with hot water and manually straightening it.
C. Cutting
In general, customers will ask you to cut the dual-color sheets. If you are using a laser sheet, you can cut it after engraving. Be careful not to cut too slowly or to cut through in one go; it’s better to do it in three or four stages.
This way, the cut edges of the material will be smooth and without traces of melting. The power used during the engraving process should be just right – not too high to avoid traces of melting.
If using a mechanical sheet, it can only be cut to a depth of 50%, and then broken off by hand and the edge sanded smooth. If the customer has a mechanical machine, the sheet can be cut on it first, and then moved to the laser machine for engraving.
D. Cleaning
After engraving, the surface can be cleaned with a damp cloth or alcohol.
However, be aware that if the laser power is set too high during engraving, a layer of difficult-to-remove soot may adhere to the surface of the dual-color sheet.
E. Coloring
If the customer’s requirements are not high, dot patterns can be used to represent different colors in the logo. If coloring is necessary, the coloring area should be engraved deeper.
Acrylic paints or alkyd enamels can be used, as other types of paint may damage the smooth surface of the dual-color sheet.
5. Glass
A. Laser Engraving on Glass
Lasers can perform surface engraving on glass, though the engraving depth is limited and cutting isn’t possible.
Typically, lasers can create a frosted or shattered effect on the glass surface.
Users usually prefer a frosted effect over a shattered one. This primarily depends on the texture and uniform hardness of the workpiece.
B. Engraving Process
Controlling glass engraving can be challenging. To achieve a smooth, frosted surface, follow these steps: Apply a bit of cleaning solution to the area to be engraved.
Cut a piece of newspaper or napkin slightly larger than the engraving area. Wet the paper thoroughly with water, squeezing out excess moisture. Then, lay the wet paper flat on the engraving area, ensuring no folds.
Place the glass in the engraving machine and engrave while the paper is still damp.
Afterward, remove the glass, clean off the residual paper, and clean the glass surface. If needed, gently polish the glass surface with a 3M Scotch-Brite.
Typically, the laser power should be set lower, precision set at 300dpi, and engraving speed should be higher. You can experiment with using larger lenses for engraving.
Note: When engraving leaded crystal with a laser, extra care should be taken.
Leaded crystal has a different expansion coefficient from ordinary crystal, which can cause cracks or shattering during engraving. Lower power settings can avoid this issue, but it’s crucial to be prepared for possible breakage.
C. Combining Laser Engraving with Sandblasting
Laser engraving machines can replace lettering machines, directly performing the cutting of sandblasting protective films on glass. This process eliminates the transfer step of the protective film, saving time and improving the quality of the final product.
D. Cleaning
After engraving, the surface can be cleaned with a damp cloth.
E. Coloring
Acrylic paint can be used for coloring.
6. Paint-Coated Copper Plate
A. Paint-Coated Copper Plate
Typically, copper cannot be engraved by a laser. However, there is a material available now with a special paint coating on its surface that can be completely vaporized by a laser, exposing the underlying copper plate.
Manufacturers usually polish or specially treat the copper plate before coating it to ensure that the exposed area after engraving is sufficiently smooth and can be preserved for a long time.
If the copper surface is not treated, a protective film should be applied after engraving to prevent oxidation and surface dirt over time.
B. Engraving
You can generally use low power, high speed, and precision settings above 500dpi.
C. Cleaning
After engraving, you can clean the surface with a damp cloth or alcohol.
D. Coloring
If user requirements are not high, halftones can be used to represent different colors in the logo. If coloring is necessary, acrylic paint can be used, as other paints may ruin the smoothness of the copper plate’s surface.