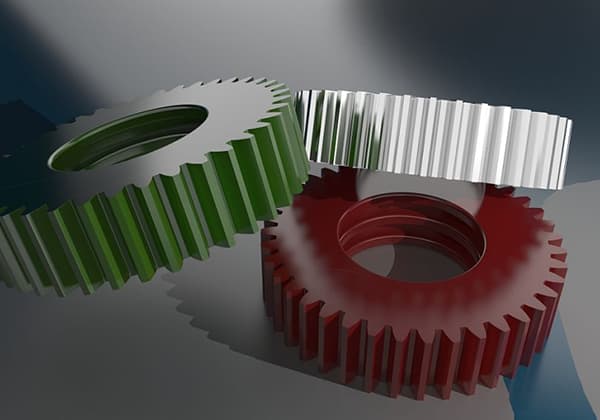
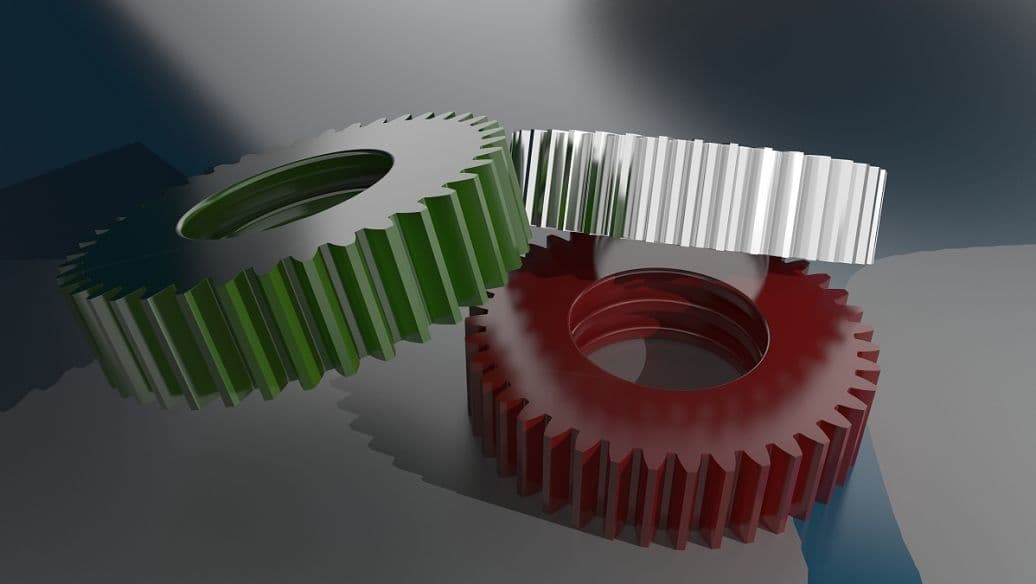
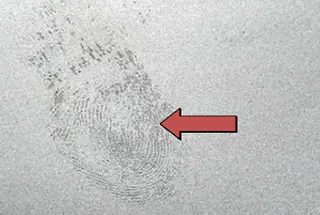
226 Solidworks Tips and Tricks | MachineMFG

226 Solidworks Tips and Tricks

0
(0)
  1. You can use CTRL+TAB to cycle through the open files in SolidWorks.
  2. Use the arrow keys to rotate a model. Press CTRL with arrow keys to move the model. Press ALT with arrow keys to rotate the model clockwise or counterclockwise.
  3. You can pin the View Orientation dialog box so that it can be used throughout all operations.
  4. Use “z” to zoom out the model or use SHIFT + “z” to zoom in the model.
  5. You can use the window splitter bars at the bottom and sides of the Workspace to simultaneously view different angles of the same model.
  6. Click the “Show/Hide Relations” icon in the toolbar to find out under-defined or over-defined geometric relations in the sketch. When the dialog box appears, click Criteria and choose Under-defined or Over-defined from its dropdown list.
  7. You can drag and drop the icon of a part or assembly from the FeatureManager design tree onto a drawing sheet to automatically generate standard 3 views.
  8. You can draw a centerline and select the mirror icon to create a “mirror line.”
  9. Hold CTRL and drag a reference plane to quickly copy an equidistant plane, then double-click on it to precisely specify the distance dimension.
  10. You can use drag-and-drop in the FeatureManager design tree to change the order of features.
  11. When opening a drawing or assembly, you can use the “Browse for Referenced Files” button in the Open File dialog box to change the referenced part.
  12. If the display of the hidden line view mode is not precise enough, you can adjust the display quality by going to Tools/Options/Documents/Quality/Graphics, and adjusting the Line Font Quality.
  13. You can use the rollback bar in the FeatureManager design tree to roll back features in a part.
  14. Using the selection filter toolbar, you can conveniently select entities.
  15. Holding CTRL and dragging a feature icon from the FeatureManager design tree onto an edge or face you want to modify, you can generate copies of fillets, chamfers, and holes on many edges and faces.
  16. Selecting the “Select Other” option from the right-click menu allows you to perform a cross-entity selection where the cursor is located.
  17. Clicking Tools/Options/Documents/Colors, and then choosing a feature type from the list and clicking Edit allows you to specify a color for the selected feature type.
  18. You can change the section line in the section view by right-clicking on it and selecting its properties option.
  19. You can create a feature array on a part and an array of arrays. In an assembly, you can create arrays of parts and arrays of assembly layer features.
  20. To check the functionality of a toolbar button, hover the cursor over the icon button on the toolbar for a while, and the tooltip will display the function of the button, and a description of the function of this tool button will appear on the status bar.
  21. A fully defined sketch displays all entities in black, while under-defined entities are displayed in blue.
  22. The first part inserted in an assembly is fixed by default. To move it, right-click on the part and select the “Float” option.
  23. When using a part family table, it is a good idea to copy and paste dimension names into the table to ensure consistency.
  24. Section lines can include arcs. When creating a section view, rotate the section plane to the projection plane to unfold the section view.
  25. In an assembly, holding CTRL and dragging a part from the FeatureManager design tree into the drawing window allows you to create another instance of the part on the assembly.
  26. You can specify the font for hidden edges, view arrows, etc. on a drawing. Go to Tools/Options/Documents/Linetype.
  27. You can display view arrows and names on a drawing view. Right-click on the drawing view, select “Properties,” click “Show View Arrows,” and specify a name (one or two characters) if necessary.
  28. You can generate copies of a part in an assembly without copying its corresponding feature.
  29. Dragging and dropping files from Windows Explorer into the SolidWorks window allows you to open multiple SolidWorks files simultaneously.
  30. In the FeatureManager design tree, select “Configure” and drag and drop any particular configurations from a part into an assembly.
  31. You can add or remove toolbar icon buttons by going to Tools/Customize/Commands.
  32. You can use Tools/Interference Detection to make sure there is no interferences between parts in an assembly.
  33. You can use the “Transparency” effect on parts by going to Tools/Options/Documents/Colors, selecting “color” and then clicking the advanced button.
  34. To change a feature’s name, double-click on it and type in the new name.
  35. You can show or hide the display of planes, axes, and origins by going to the View menu.
  36. In Tools/Customize/Keyboard, you can create keyboard shortcuts for the most frequently used commands.
  37. In Tools/Sketch Tools/Modify, or on the Sketch Relations toolbar, you can move, rotate, or scale an entire sketch.
  38. Using View/Display/Section View, you can generate a section view on a model.
  39. You can create a custom drawing template and save it using the File/Save as Template command.
  40. Using Tools/Sketch Tools/Dynamic Dragging Dimension, you can modify the dimension values while dragging sketch entities. You can set it as the default behavior by going to Tools/Options/System Options/Sketch.
  41. You can select multiple features on the FeatureManager design tree by holding down the Shift key.
  42. You can specify different line styles for many engineering drawing items, including the borders of local views. Go to Tools/Options/File Properties/Line Types on the menu and choose your selection.
  43. If a sketch is under-defined, a negative sign will appear in front of its name on the FeatureManager design tree. If the sketch is over-defined, a positive sign will appear in front of its name.
  44. When you drag and drop a part onto the FeatureManager design tree of an assembly, it will be placed in the same position as the origin of the part and assembly overlap, and the default reference faces of the part will be aligned with the default reference faces of the assembly.
  45. When making extrusions between similar sketch contours, copying the sketch is often a useful method. Select the sketch or an entity in the sketch on the FeatureManager design tree, press CTRL-C to copy, then select a reference plane or surface and press CTRL-V to paste the sketch.
  46. You can press the “F” key at any time to scale the view to the most appropriate size.
  47. Select the rollback bar in the FeatureManager design tree and use the up and down arrow keys on the keyboard to step through the part’s feature creation sequence. Before starting this feature, go to Tools/Options/System Options and enable the feature scroll navigation option in the FeatureManager design tree.
  48. You can adjust the system’s view orientation for a part or assembly. Open the View Orientation dialog box, click on any viewpoint name and select Update, and the current view orientation will replace the selected system default view, with all other system views updated accordingly.
  49. You can measure the shortest distance between edges, faces, sketch entities, and components. Use Tools/Measure on the menu and select a pair of entities to measure.
  50. You can view a preview image of a SolidWorks model in Windows File Explorer. Right-click on the file and select Quick View, then choose File/Open File With to open the model file.
  51. You can change the rotation increment when rotating a model with the arrow keys by selecting Tools/Options/System Options/View Rotate, and changing the value in the Arrow Key Increment box.
  52. You can redraw or refresh your screen with CTRL-R.
  53. When entering a dimension value, you can use mathematical or trigonometric expressions, such as *.
  54. You can select multiple annotations while holding down the CTRL key and modify them simultaneously.
  55. You can drag the break lines in an engineering drawing to change the break length of the broken view.
  56. When performing reference or equidistant operations on each edge of a face, loop, or sketch outline, selecting the entire face, loop, or sketch will be easier than selecting each entity individually.
  57. Drawing formats can operate like objects linked and embedded in files, allowing you to embed an object such as a .BMP image into the format.
  58. Holding down the Shift key while selecting dimension text in an engineering drawing allows you to move a dimension from one view to another. Holding down the CTRL key while selecting dimension text in an engineering drawing allows you to copy a dimension from one view to another.
  59. When dimensioning arcs or circles, select the maximum and minimum conditions in the dimension properties, and the dimension can be modified to be placed on the tangent edge instead of the arc or circle center.
  60. If a feature or rebuild fails, right-click on the icon in the FeatureManager design tree and select “What’s wrong” command to view the error message.
  61. You can generate a part in an associated assembly (using a bottom-up design approach).
  62. You can hide or suppress components or features in an assembly. Hiding a component or feature makes it invisible, while suppressing functionally removes it from the activated assembly, but does not delete it.
  63. You can use commonly defined Windows mapping shortcuts to quickly execute Ctrl-N (New).
  64. You can embed an active SolidWorks object into MS Word or other OLE 2.0 applications.
  65. You can copy values from the Measure dialog box by using Ctrl-C and Ctrl-V, and paste them into other SolidWorks dialog boxes.
  66. You can select the “read-only” option when opening a part to prevent write access to the part.
  67. You can use equations between features and components to ensure design intent.
  68. If your default unit is inches, you can still enter metric values in the numerical box, such as 25mm, and SolidWorks will automatically convert the value to the default unit.
  69. Using the menu command File/Find Related Files/Copy, you can copy all referenced files in an assembly to a new directory.
  70. You can directly import Parasolid files and assemblies into SolidWorks.
  71. You can attach geometric tolerances to a dimension value by dragging and dropping the geometric tolerance onto the dimension.
  72. You can switch between different split windows without using the mouse. Use the Tab or F6 key to activate the next window, and Shift-Tab or Shift-F6 to activate the previous one.
  73. You can generate sketch points at virtual intersection points of two entities. Hold down the Ctrl key while selecting the entities, and choose the Sketch Point toolbar icon. To change the display of the sketch point, click Virtual Sharps on the Detailing tab in the Tools/Options dialog box.
  74. You can check the sketch to determine if it can be used to generate a specified feature type. When editing a sketch, choose Tools/Sketch Tools/Check Sketch for Feature Usage on the menu.
  75. When using the Fillet tool, you can add a sketch fillet by selecting the vertex position of an intersection point of the entity.
  76. You can use the Fillet tool to add fillets to sketch entities that do not intersect. When adding the fillet, these entities are automatically trimmed or extended.
  77. You can replace an entity used in sketch geometric relationships using the Entity Table in the Show/Delete Geometric Relations dialog box, which also displays information about the state and position of each entity.
  78. You can add some types of geometric relationships to multiple entities at the same time. For example, you can select three lines and set them to be equal in length.
  79. You can use feature control points to move or change the dimensions of extruded and revolved features. Click the Dynamic Modification Feature toolbar icon on the Feature toolbar, and then select a feature to display its control points.
  80. When using the rotation feature control points, you can move the cursor away from the model to obtain more precise control over the rotation.
  81. When dragging a feature, holding down the ALT key will allow the feature to maintain its position, size, and geometric relations, allowing it to move only in the direction that is not controlled by the dimension or geometric relation.
  82. To select the midpoint of an edge, right-click on the edge and choose “Select Midpoint.”
  83. You can use an assembly envelope to quickly select assembly components for different operations, such as compressing, decompressing, hiding, showing, copying, and deleting.
  84. You can define many mating conditions and then solve them all at once. Choose the “Solve as an assembly” option in the Assembly Mates dialog box.
  85. To copy an exploded view from one assembly to another, right-click on the view in the FeatureManager design tree and choose “Copy.”
  86. You can align and group many dimensions on a drawing. Hold down Ctrl and select them, then choose “Align Collinear” or “Align Parallel” from the Annotation Dimension toolbar.
  87. When you save an assembly as an IGES, STL, or VRML file, you can save the entire assembly as a single file or save each component in the assembly as a separate file.
  88. The Save As dialog box allows you to save any SolidWorks file as a TIF file.
  89. Once you specify a number of changes for each activated file, you can automatically save its auto-recover information. Choose “Tools > Options > System Options > Backup,” enable this option, and specify the number of changes.
  90. You can specify the directory where SolidWorks saves your backup files. Choose “Tools > Options > System Options > Backup,” then browse to that directory.
  91. You can annotate the actual length of an arc by selecting the arc and its two endpoints.
  92. You can zoom in on selected entities. Select one or more edges, faces, or other entities, then click the zoom selection toolbar icon in the view toolbar. You can also right-click on an item in the FeatureManager design tree and select “Zoom to Selection” from the dropdown menu.
  93. You can drag a file from Windows Explorer and drop it into the SolidWorks window to execute a macro.
  94. You can add a sheet metal feature to an imported entity. Simply import a suitable entity from one of the supported file formats that has a single thickness, then select a flat face and click the Insert Bends toolbar icon.
  95. You can generate a custom bend table for your sheet metal part. Use a text editor such as Notepad to edit the bend table for this instance. Find the sample.btl file under <install.dir>langenglish, save the table under a new name with a *.btl extension, and save it in the same directory.
  96. You can use the Flatten button on the FeatureManager design tree toolbar to return a sheet metal part to its flattened state. The No Bend toolbar icon button returns the part to its state before any bends were added.
  97. In a drawing, you can individually control the line style, color, and thickness of model edges, sketch entities, and the template.
  98. You can generate an indented bill of materials (BOM). Each sub-assembly is listed as an item with its components listed below it, indented without item numbers.
  99. By default, the text font used in a bill of materials (BOM) matches the annotation font specified in the drawing.
  100. In a drawing’s break view, you can insert multiple break lines (all in the same direction).
  101. You can generate a projected view from a section view.
  102. You can control the placement of projected, section, detail, and auxiliary views. A preview of the view boundary is attached to the cursor to help you place the view where you want it.
  103. When you create a new projected, section, or auxiliary view, it’s aligned by default with the main view it’s projected from. To disengage this default alignment, hold down the Ctrl key when you place the view.
  104. When dragging a view, you can control whether or not the contents of the drawing view are displayed. Choose “Tools > Options > System Options > Drawings” and set the option “Display contents while dragging drawing views.”
  105. When your referenced model changes, you can specify whether or not the drawing views automatically update. Choose “Tools > Options > System Options > Drawings” and set the option “Automatically update drawing views.”
  106. You can print a selected area within a drawing, and you can specify a scaling factor for the printed area.
  107. If you show dual dimensions, you can place the alternate unit dimension above or to the right of the primary unit dimension. Choose “Tools > Options > Document Properties” and specify this option.
  108. To center dimension text on the dimension line, right-click on the dimension and choose “Align Text.”
  109. To show a diameter dimension as a linear dimension in a drawing, choose “Show Linearly” from the context menu. Dragging a dimension witness point (e.g., for a diameter dimension) snaps the dimension line in increments of 15 degrees, allowing you to align the dimension horizontally or vertically.
  110. You can insert, copy, or move a radius dimension to any view where the actual arc can be displayed.
  111. You can select multiple annotations while holding down Ctrl and move them together as a group.
  112. When you create or update a section view, a center line is automatically created for each hole or rotational feature. Choose “Tools > Options > Document Properties” and specify the extension beyond the model edge to which center lines are extended.
  113. To add hole callouts to multiple holes, click the Hole Callout toolbar icon, then select each hole you want to add a callout to.
  114. You can pre-select the entity to which a geometric tolerance symbol should attach. If you select an edge, the leader will attach perpendicularly to that edge. If you select a dimension, it will attach to the dimension line.
  115. In a drawing, you can add a hatch pattern to the face of a model or within a closed loop of a sketch entity.
  116. When you change an attachment point for an item in a detail, the arrowhead style changes depending on whether you specify an attachment to a plane, an edge, or a vertex. Choose “Tools > Options > Document Properties” and specify the arrow styles with the arrow buttons.
  117. From the Insert Model Items command on the menu, you can input reference geometry from a model onto a drawing.
  118. To move a component to a sub-assembly, drag the component and drop it on the sub-assembly in the FeatureManager design tree. If you want to reorder the components within the sub-assembly, hold down the ALT key while dropping the component.
  119. You can compress a component in the FeatureManager design tree from the right-click menu.
  120. You can create a blank drawing template that does not prompt the user to use a sheet format when loaded. To create this template, open any SolidWorks drawing template that has a sheet format, delete all entities, and save the file as a new template. The drawing will now have a blank sheet when the template is used.
  121. You can move all entities on the engineering drawing of the mobile project, including annotations, sketch entities, engineering views, etc. To do so, select the “Move” command from the right-click menu of the top-level engineering drawing icon in the FeatureManager design tree.
  122. You can edit a drawn polygon by selecting “Edit Polygon” from the right-click menu of one of its edges.
  123. You can use configurations in the design tree to control the color of parts.
  124. You can enable or disable the performance email option in Tools/Options/System Options/General.
  125. SolidWorks system options apply to all SolidWorks files, while SolidWorks file properties are set at the file template level.
  126. For improved performance, SolidWorks stores geometric relationships in non-active memory. When the pointer moves over an appropriate edge or entity, it turns orange to “wake up” the appropriate geometric relationship.
  127. You can move a single component to its own layer in the engineering drawing. Right-click the component in the engineering view, select Component Line Style, and then select a layer from the menu.
  128. If you have an engineering view displaying countless different models (individual files), you can select custom properties to extract from a particular model. Right-click the engineering drawing and select Properties. From the Drawing Setup dialog box, select the “Use custom properties from displayed model” menu. On each drawing, you can select a model that can extract these custom properties.
  129. SolidWorks Explorer can be enabled as a standalone application or from within SolidWorks. Select Tools/SolidWorks Explorer to enable it from within SolidWorks or choose SolidWorks Explorer from the Start menu to enable it as a standalone application.
  130. SolidWorks has a wide range of sample model libraries. These samples are located in the Model Library in the support section on the SolidWorks website. The models are available for free download to SolidWorks subscription users. Log in to the support section of www.solidworks.com and select Model Library.
  131. SolidWorks has an extensive library of example models that can be downloaded for free by SolidWorks subscription users. These models are located in the Model Library in the support section on the SolidWorks website. Log in to the support section of www.solidworks.com and select Model Library.
  132. After downloading a new SolidWorks service pack, you can see what changes have been made by selecting Help/SolidWorks Release Notes.
  133. You can control the relative distance of a model displayed in perspective view. To display a model in perspective view, select View/Modify/Perspective. Then select an observation position greater than or less than 1. To make the perspective view more realistic, a value less than 1 will produce the desired effect.
  134. You can add Tiff files as pictures to the graphic area of SolidWorks models. Click Insert/Picture and browse to the directory containing the desired Tiff file.
  135. Pictures inserted into the background of a SolidWorks model can be removed or replaced. Click View/Modify/Image.
  136. You can enter surfaces directly into a SolidWorks model. Supported file formats include Parasolid, IGES, ACIS, VRML, and VDAFS.
  137. In SolidWorks, you can view the curvature of a surface from the right-click menu. “Cool” colors (black, purple, blue) indicate low curvature (low flatness), while “hot” colors (red, green) indicate high curvature.
  138. You can set the numerical value for defining curvature in a SolidWorks file. Click the curvature button in Tools/Options/File Properties/Color.
  139. You can generate a fitting reference in a part file. This allows users to find possible fitting partners for specified entities. Reasoning about possible fitting partners when dragging parts into an assembly. This option is located in Tools/Fitting Reference.
  140. If your sheet metal part contains automatic cut release slots, you can choose “tear shape” or “rectangular” without selecting rectangular release slots.
  141. You can add notches to your sheet metal parts when adding sheet metal features. Click the Notch tab to do so.
  142. You can generate a sheet metal part that can be unfolded from a cylindrical or conical model. All lines associated with the cylinder must be tangent.
  143. You can generate an engineering drawing for an unfolded sheet metal part. After inserting a named view into the engineering drawing, select Flat Pattern from the PropertyManager view directional list.
  144. You can automatically activate the toolbar applicable to the model. Select Tools/Customize and then check “Automatically activate file toolbars.”
  145. You can change the size of the inserted OLE object while maintaining its aspect ratio. Right-click on the OLE object and select Properties. When one value changes, the other values will update to maintain the aspect ratio.
  146. You can generate a split FeatureManager design tree by grabbing the gray bar at the top of the FeatureManager design tree and dragging it downwards. Its position will be saved with the file, or can be saved to the file template for all new files.
  147. You can enter SolidWorks 2D sketch commands from the command line by activating the SolidWorks 2D Simulate program plugin. To get a list of all commands, type “help” in the command line.
  148. After importing a file into SolidWorks, you can run “Import Diagnostics” on the file to find any bad faces or edges in the file. Import Diagnostics often can fix these errors or clear them.
  149. You can split arcs, circles, ellipses, or splines in a SolidWorks sketch or drawing (for sketch entities only). Right-click the entity and select “Split Line.”
  150. You can turn off automatic inference lines. While a sketch is open, select Tools/Sketch Entities, and then uncheck “Enable on-screen numeric input on entity creation.”
  151. If you insert a new series of part design tables into a part, SolidWorks automatically generates a configuration called “First Instance,” which you can use to carefully check dimensions and add them to the columns of the part design table. You can double-click on a feature to add the compressed state of the feature to a column in the part design table.
  152. In an engineering drawing file, the drawing scale can be opened or closed by clicking View/Scale. This setting can be saved in the file template.
  153. When rotating a part with transparent faces, you can improve performance by unchecking “Dynamic View Mode – High Quality” in Tools/Options/System Options/Performance. This will change the quality of the transparent faces when rotating the model to “Screen Door” instead of “Alpha Blending.”
  154. You can categorize items in the Material List by right-clicking the Material List, selecting Properties, and then choosing the Contents tab. Click any column displayed on the label to categorize the label. Click again to reverse the order.
  155. Unchecking the green checkmark on a Material List Contents label will hide parts while retaining the numbering structure.
  156. You can click the light bulb in the Layer dialog box to turn layers on or off. When a layer is turned off, any entities assigned to that layer will be hidden.
  157. Assembly features can have excluded parts from the feature. To exclude a part, right-click the feature in the FeatureManager design tree and select “Feature Scope.”
  158. You can connect annotations to engineering views (they will move to maintain their position relative to the engineering view). Open the Dynamic Viewport, right-click the view, and select “View Lock.” This will keep the view active even when the cursor moves to another engineering view.
  159. Rotate SolidWorks models with the middle mouse button. Shift + middle mouse button zooms in or out. Ctrl + middle mouse button pans. For engineering drawings, middle mouse button alone pans.
  160. You can change the position of hyperlinks on an engineering drawing. Move the pointer to the corner until the pointer changes to an “A,” then drag the link, and you can change the position of the link.
  161. You can press the space bar to display the View Orientation dialog box.
  162. Working with the “Delay Mates” checkbox in the PropertyManager allows you to create multiple mates without changing the position of the parts. When you uncheck this option, all mates will be resolved and all parts will move into place.
  163. When adding dimensions, right-clicking allows you to lock the direction of the dimension (angle inward/outward or horizontal/vertical/parallel). Then you can drag the number to place the text where you want it without changing the direction.
  164. The Entity Selection Filter toolbar can be turned on/off by pressing F5. Active filters can be turned on/off by pressing F6.
  165. You can add comments to equations in SolidWorks. When editing an equation in the Equation Editor, use the apostrophe symbol (single quote) at the beginning of the comment. Anything after this reference will be ignored in the calculation of the equation.
  166. To see if a sketch is suitable for a particular feature, use “Check Sketch for Feature” under Tools/Sketch Tools.
  167. If you select the option “Only one command repetition per selection,” you can still double-click a button to use the command multiple times.
  168. The display/style of arrows will change depending on what type of entity the arrow is placed on.
  169. You can use the column heading $$prp@<custom property name> to add configuration-specific custom properties to a part design table.
  170. You can control file size by using Hide/Show entities. When entities are hidden, the display information is minimal, resulting in a smaller file size.
  171. Holding down Ctrl while dragging an annotation leader will copy the leader.
  172. You can dynamically rotate around a plane, linear edge, or vertex. With the Rotate View tool active, select the entity. To reset the dynamic rotation around the center, simply click once in blank space while the tool is still active.
  173. To view multiple drawings at once in an engineering drawing, select Window, New Window, and then Tile your windows. You can choose different engineering drawing sheets in each window.
  174. Surfaces to be removed from sheet metal forming features can be specified by marking the corresponding surfaces on the forming tool as red.
  175. You can copy keyboard shortcuts from one computer to another by copying and pasting your <username>.cus file from your SolidWorks installation user directory.
  176. You can search for a feature in a part, assembly, or engineering drawing. Use the “Go to” option in the right-click menu at the top of any FeatureManager design tree.
  177. You can change views (front, back, right, left, top, bottom, and isometric) by pressing Ctrl and selecting a number from 1-7.
  178. When creating your own forming tools for sheet metal, the minimum radius of curvature should be greater than the thickness of the sheet metal.
  179. You can download all Knowledge Base FAQs in text file format.
  180. You can use the right-click menu to break or lock external reference links in features. Breaking permanently eliminates the reference link, while locking freezes the reference link (it will not update), and new reference links cannot be added to the part. Right-click any part with external reference links and select “Display External Reference Links.”
  181. Opening a SolidWorks file in “Open as read-only” mode is the same as opening the file in the SolidWorks browser.
  182. Sketch accuracy in SolidWorks is 1×10⁻⁶ meters, while feature accuracy generated in SolidWorks is 1×10⁻⁸ meters.
  183. Profile edges can only be given fillet and relation when sketch is open in part or assembly, but anytime in drawing.
  184. Collision detection in an assembly can use sound. This sound file can be customized by clicking Start/Settings/Control Panel/Sounds and changing to the default beep.
  185. Part numbers in an assembly can display item numbers, quantities, or custom values. This custom value can be linked to the file’s custom properties, hyperlinks, or plain text.
  186. If you want to make a sketch of a face of a model, you can select the face, open a new sketch, and then use Convert Entities. This will project all of the edges of the face onto your sketch plane.
  187. When you copy a sketch to another reference plane, you are not limited by the parent-child relationships of the previous sketch. This is particularly useful for lofted (mid-plane) and swept (guide curve) features.
  188. Because helical curves can cause performance issues, output DXF/DWG and then input the engineering drawings with helical curves and save simple 2D lines as a block. Insert the block into the desired location in the engineering drawing.
  189. You can use SolidWorks blocks to represent the title block of an engineering drawing. This makes it easy to move or resize the title block within the drawing.
  190. You can align the grid lines (if displayed) in a sketch with linear edges in the model.
  191. You can use the Microsoft Windows Calculator to generate operators for input numeric formulas, and then cut and paste them as needed.
  192. You can dimension the true length of an arc. Click on the arc, and then click on each endpoint of the arc.
  193. If you are a Windows NT or Windows 2000 user, you can set the priority of SolidWorks in your operating system. Open Task Manager and select the Processes tab. Right-click on sldworks.exe and set the priority to High or Realtime. Note that when set to Realtime, your operating system will only process SolidWorks when performing operations.
  194. You can enter symbols (such as @ or £) in custom properties or annotations. Use ASCII keyboard codes or the Windows Character Map tool. (Not available on Asian language operating systems.)
  195. In the Open dialog box, you can use the standard Microsoft search function to help you find files more quickly in large directories. For example, *hardware.sldprt will search for any part with the word “hardware” at the end of its name, such as “metric_hardware.sldprt.”
  196. You can create a perspective view in an engineering drawing. First, generate a named view in the model using the View Orientation dialog box. Then insert this named view into the engineering drawing.
  197. Converted edges are fully defined. However, you can drag the endpoints of these edges to make them underdefined. Endpoint relations are therefore called “soft” relations.
  198. SolidWorks has its own newsgroup, which can be accessed from the company’s website. The newsgroup is named comp.cad.solidworks. If your company does not support newsgroup access, you can access it through deja.com.
  199. The search path used by SolidWorks Explorer is taken from SolidWorks Tools/Options/System Options/File Locations/Referenced Files.
  200. You can set gradient color schemes in the graphics area of SolidWorks. This is located under Tools/Options/System Options/Colors. Once you have set the colors, remember to check the “Use gradient background in parts and assemblies” option.
  201. When inserting a new component or file in an assembly, you can control which file template is used. Under Tools/Options/System Options/Default Templates, select “Prompt user to select template file.”
  202. If you have saved a RapidDraft drawing but did not enable the ability to select hidden edges in RapidDraft, you can restore this option. Load the model, right-click on a view, select Properties, and then check “Selectable hidden edges.”
  203. The “Color Display Mode” button on the Line Format toolbar allows users to switch between displaying the layer and explicit color assigned to sketch entities and the color that represents the entity’s status (fully defined, underdefined, etc.).
  204. Blend chamfers can better eliminate faces in a model. This is why blend chamfers are generally recommended when regular chamfers are not successful.
  205. You do not have to send a new registration wizard file for every new version of SolidWorks. Existing subscription customers should be able to obtain a registration code that is automatically generated from the CD shipped.
  206. The values displayed on the PropertyManager are measured relative to the coordinate system of the sketch. This is different from the values obtained from Tools/Measure, which are measured relative to the selected coordinate system (which defaults to the model origin).
  207. eDrawings supports multi-sheet drawings. To view different sheets in eDrawings, right-click anywhere in eDrawings, select Drawing Options, and then choose the sheet.
  208. You can control the HLR/HLG color of a component based on the assembly or part in an assembly. Select View/Display, activate/deactivate “Use component color for HLR/HLG.” To update the display, the model needs to be rebuilt.
  209. You can print a window in an engineering drawing without printing the entire drawing. Select File/Print. In the Print Range options, select the “Selected window” option, and then click OK. A print preview with a gray “window” will open, which can be moved by dragging and resized using the scale options.
  210. You can control the decimal precision of line thickness in the file/page setup by using Tools/Options/File Properties/Units/Linear Units.
  211. The maximum number of light sources that can be added to a SolidWorks model is eight.
  212. Decorative thread lines can follow a counterbore hole as well as a simple through hole.
  213. You can create a part pattern derived from an assembly feature pattern.
  214. You can use the Convert Entities sketch tool in a 3D sketch.
  215. When generating a curve through free points, you can use a series of x,y,z values separated by commas.
  216. Hole Wizard custom holes are stored in a Microsoft Access file named default.mdb. You can copy this file to another computer to transfer your favorites.
  217. SolidWorks 3D Meeting allows users to control SolidWorks meeting sessions from remote locations. Select Tools/3D Meeting/Allow Others to Edit to activate this feature.
  218. In SolidWorks 3D Meeting, a user can log on to a neutral server as a way of starting a meeting. To specify a server, open Microsoft NetMeeting and select Tools/Options, then enter the directory name in the provided field. SolidWorks recommends the server ils.bytebeam.com.
  219. You can explode a sub-assembly without exploding the top-level assembly. Select the “Step Edit Tool” (yellow step button). This will open a dialog box. Then select the option “Components only” and choose the desired parts.
  220. You can hide/show surfaces and solids in a SolidWorks model from the FeatureManager design tree or the right-click menu in the graphics area. Because hidden models are not visible, it is often easier to make surfaces or solids visible again using View/Hide-Show Bodies.
  221. If there is an error while editing the drawing format, you can return to the default format. Right-click and select Properties, then click “Reload Drawing Format.”
  222. You can delete mate and sub-assembly layer features when not in edit sub-assembly mode, but you must edit the sub-assembly to delete components within it.
  223. If you use a non-circular contour to generate a local view, you can make the view default to display a circle. Check “Display new local view icons as circles” in Tools/Options/System Options/Drawings.
  224. You can choose not to insert the model’s copied size into the drawing by default (in Tools/Options/System Options/Drawings), or when the Insert Model Items box is selected.
  225. You can display the “open loop” edges of a surface in different colors – to distinguish between internal edges, tangent edges, or contour edges. Check the box under Tools/Options/System Options/Edge Display/Selection. The color of open loop edges is controlled by Tools/Options/System Options/Colors.
  226. SolidWorks currently offers four high-quality plugins: PhotoWorks (realistic rendering of images), FeatureWorks (automatic recognition of SolidWorks features from input entities), Animator.

How useful was this post?

Click on a star to rate it!

Average rating 0 / 5. Vote count: 0

No votes so far! Be the first to rate this post.

As you found this post useful...

Follow us on social media!

We are sorry that this post was not useful for you!

Let us improve this post!

Tell us how we can improve this post?

Leave a Comment

Your email address will not be published. Required fields are marked *

Scroll to Top