Punching Force Calculator & Formula (Online & Free)
Have you ever wondered how to ensure a successful metal stamping project? In this blog post, we'll dive into the critical factors that can make or break your stamping process.…
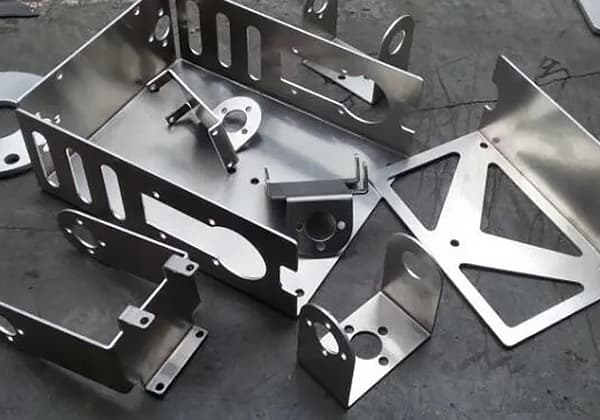
Process planning for sheet metal bending parts refers to the sequential order of the bending processes during fabrication. The bending sequence should be arranged based on the shape of the part, precision requirements, nature of the operations, and the pattern of material deformation. For specific bent parts, begin by considering its production volume, structural design, […]
Process planning for sheet metal bending parts refers to the sequential order of the bending processes during fabrication. The bending sequence should be arranged based on the shape of the part, precision requirements, nature of the operations, and the pattern of material deformation.
For specific bent parts, begin by considering its production volume, structural design, dimensional accuracy, and material, and conduct a review of its bending process feasibility. Then, based on the specific production conditions and a comprehensive analysis of influencing factors, develop a technically feasible and cost-effective bending process plan.
The bending process plan mainly includes process analysis of the bent parts and formulation of the bending process scheme. The general steps are as follows:
The original data includes the product drawings and technical conditions of the bent parts, the size specifications, performance, and supply status of the raw materials, the production volume of the product, the existing stamping equipment conditions in the factory, and other technical data.
Among these, the product drawing is the most direct basis for process design, other technical data serve as references for stamping die design, and the remaining original data is used to determine the processing method of the stamped parts, formulate the stamping process plan, and choose the structure type of the mold.
Bendability refers to the adaptability of a component to bending processes. This means assessing whether the structure, size, precision requirements, and materials of the bent component meet the technical requirements of bending fabrication.
Generally, components with good bendability ensure less material consumption, fewer operations, simpler tool structure, stable product quality, and low cost. It also allows for economical and sensible technical preparation and production organization.
The purpose of analyzing bendability is to understand the ease or difficulty of processing the bent component, laying the foundation for the development of a bending process plan.
Before analyzing product bendability, an economic production analysis should be conducted first. The production quantity of bent components is a critical factor in determining the reasonableness of the bending process.
Product bendability analysis should be based on the component drawings. A thorough analysis of the shape, size, precision requirements, and bending formability of the used material is essential. It also involves assessing the potential for various quality issues.
Special attention should be given to the component’s limit dimensions (such as minimum bent edge size, minimum hole edge distance, minimum bending radius), dimensional tolerances, design references, and other special requirements.
These factors significantly influence the nature, number, and sequence of required operations as well as the positioning method, bending mold structure, and manufacturing precision.
After the above analysis, if the component’s bendability is found to be unreasonable, the product designer should be consulted.
Without compromising the product’s usage requirements, appropriate modifications can be made to the shape, size, precision requirements, and material selection of the bent component.
Based on the analysis of the bending process, several bending process plans are proposed. Then, by comprehensively analyzing and comparing various plans according to production volume and existing production conditions of the company, the most technologically and economically optimal process plan is determined.
Generally, formulating a bending process plan mainly includes the following contents:
In short, while satisfying the requirements of the part drawing, we strive for fewer operations, simple bending mold structure, longer life, and convenient operation.
Generally, the arrangement of bending operations should follow the following principles:
1) For bending pieces with simple shapes, a one-time bending molding is adopted; for bending pieces with complex shapes, two or more bending moldings are adopted.
2) For bending pieces with large quantities and smaller sizes, progressive dies or compound dies forming is preferably used.
3) For multi-angle bending pieces, bend the outer corner first, then the inner corner. The subsequent bending should not destroy the shape of the previous bending part. The previous bending must take into account that the subsequent bending has an appropriate positioning base and can be carried out smoothly.
4) Bending should proceed from small to large.
5) Special shapes should be bent first, followed by general shapes.
6) For bending parts with holes, holes can generally be punched before bending to simplify the mold structure. When the hole is located in the bending deformation zone or close to the deformation zone, and the hole has high requirements with the reference surface, bending should be done before punching the hole.
1) Simple one-time bending parts, as shown in Figure 1-1.

2) Two-time bending parts, as shown in Figure 2-2.
a) Flat pattern
b) First bend
c) Second bend
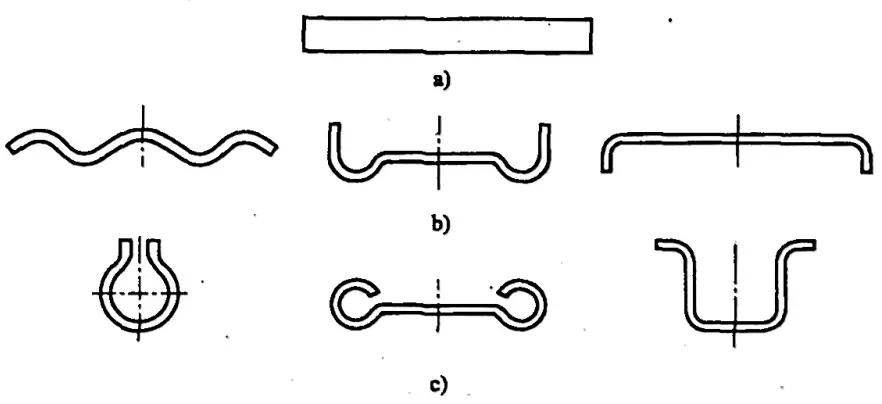
3) Three-time bending parts, as shown in Figure 3-3.
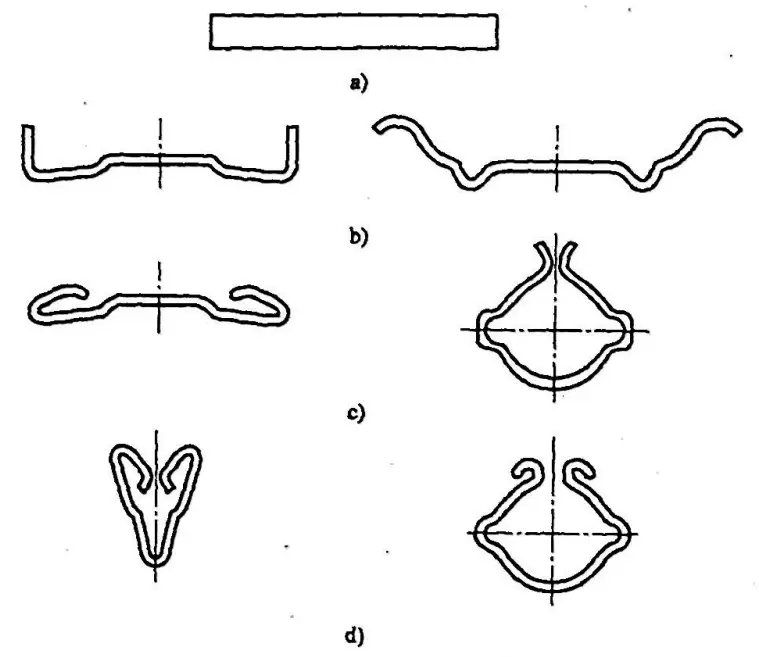
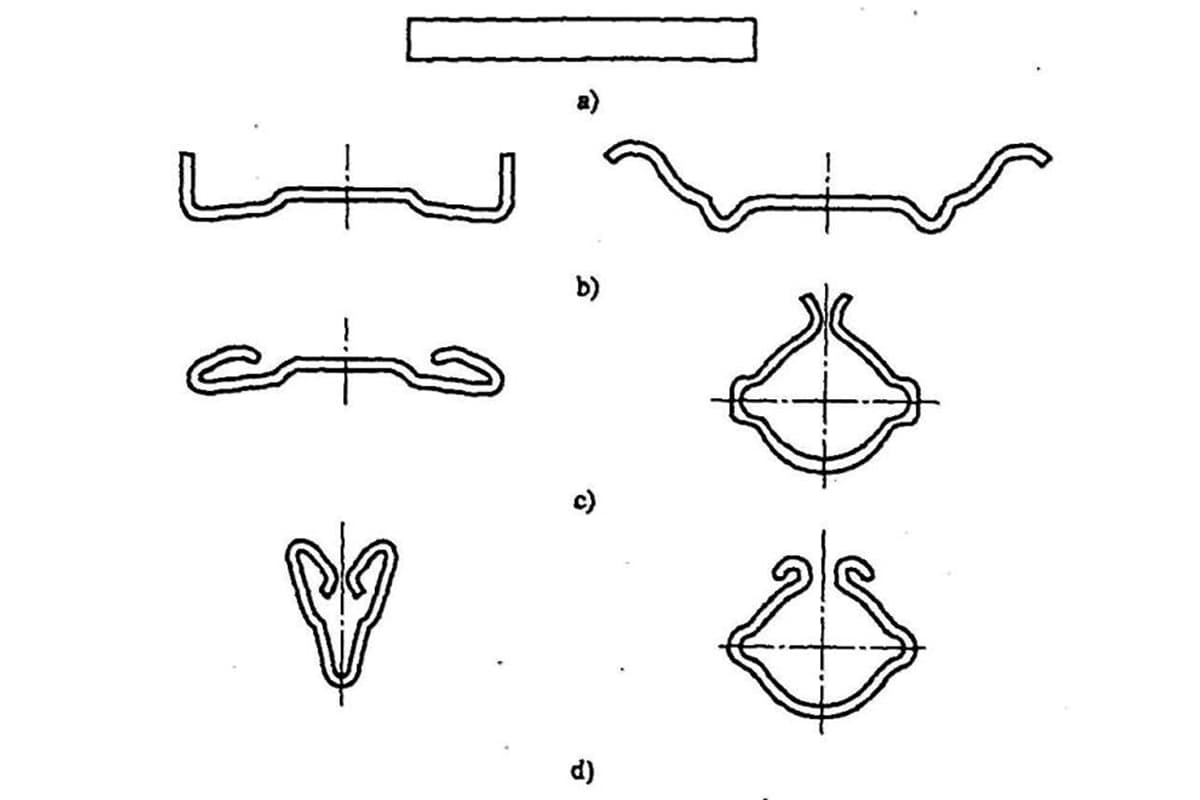
4) Four-time bending parts, as shown in Figure 4-4.


As the founder of MachineMFG, I have dedicated over a decade of my career to the metalworking industry. My extensive experience has allowed me to become an expert in the fields of sheet metal fabrication, machining, mechanical engineering, and machine tools for metals. I am constantly thinking, reading, and writing about these subjects, constantly striving to stay at the forefront of my field. Let my knowledge and expertise be an asset to your business.