Have you ever wondered why cracks appear in metal parts during manufacturing? In this insightful blog post, we’ll dive into the intriguing world of forging cracks, heat treatment cracks, and raw material cracks. Our expert mechanical engineer will guide you through the causes, identification, and prevention of these common defects, providing valuable knowledge to enhance your manufacturing processes.
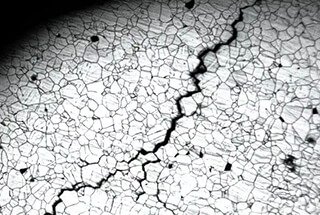
There are various types of cracks: such as cracks in raw materials, cracks caused by heat treatment, and forging cracks, which can be confusing.
Identifying them is an important course of action as it helps locate where the crack occurred accurately, which can aid in analyzing the reason why the crack occurred.
Firstly, we need to clarify the concepts of “cracks in raw materials” and “forging cracks”. The cracks that occur after forging should be considered as “forging cracks”.
However, the main factors which lead to the formation of forging cracks can be classified into the following:
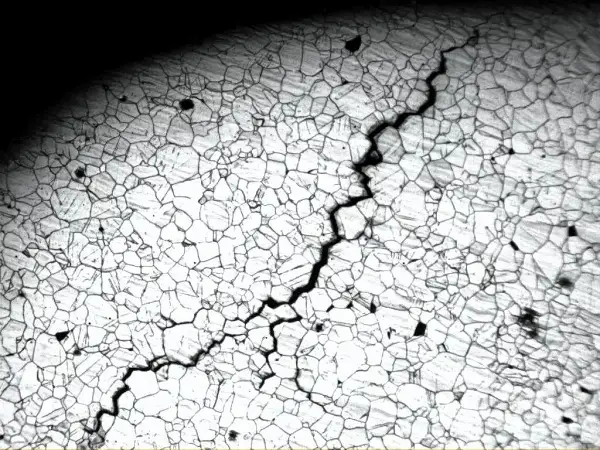
To roughly differentiate, cracks can be classified by their macroscopic morphology. Transverse cracks are generally unrelated to the parent material, while longitudinal cracks require analysis that combines crack morphology and forging process.
Decarburization on both sides of a crack indicates that it occurred during forging. As for whether it was caused by the raw material or the forging process, analysis based on metallography and process is required.
For workpieces of the same model and the same batch, forging cracks are usually located in the same position and extend relatively shallowly under the microscope with decarburization on both sides. Material cracks may not repeatedly occur at the same location and may have varying depth under the microscope. There is still some regularity to observe and analyze.
Material cracks mostly align with the material’s longitudinal direction. There are two types of forging cracks: one caused by overheating and oxidation leading to decarburization near the crack, while the other caused by the tearing phenomenon of lattice damage during cold iron forging can be distinguished through metallography.
The purpose of forging is as follows:
Therefore, there must be certain defects inside the raw material for forging. Large cast forgings are often directly forged from steel ingots, which inevitably contain a large number of casting defects. Reasonable forging can also forge these so-called defects.
Therefore, the rationality of the forging process is the main factor that determines whether the forging will crack.
Of course, based on a stable forging process, if explicit control requirements for raw material defect grades are made before forging, and the cracking phenomenon appears due to raw material defects exceeding the requirements during forging, this can be considered as “forging cracks caused by defects in raw materials”.
Crack problems require specific analysis, coupled with analysis of the forging process, and consideration of whether there is protective atmosphere during the heating process.
Forging should be the process of forging and compacting raw material cracks. Oxide scale is usually tight and grey, while dirty and loose debris from the sampling process is black.
Looking under high magnification can reveal the difference, however, energy spectrum analysis can always distinguish them when other methods fall short.
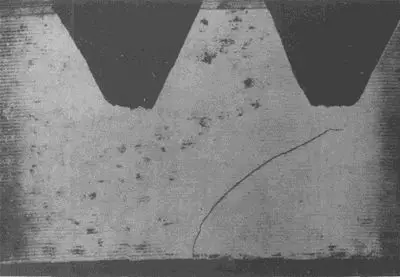
Forging cracks generally form at high temperatures during forging deformation. When cracks expand and come into contact with air, under a microscope with a magnification of 100X or 500X, the cracks can be seen with oxidation scales and decarburization on both sides, with the structure being primarily ferritic.
The morphological characteristics of these cracks are that they are relatively thick and often exist in multiple forms, without a clear pointed end, relatively round and pure, and without clear directionality.
In addition to these typical forms, sometimes finer forging cracks may appear. The decarburization around the crack is not complete but partial.
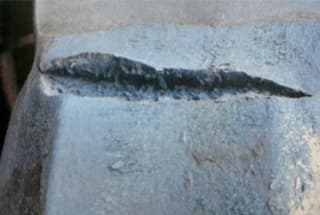
Typical examples of forging cracks include:
More oxide on the edges of the crack.

Forging cracks are formed during the process of steel forging and can be attributed to various reasons. Predominantly, they can be divided into two major categories: forging cracks caused by raw material defects and those induced by the forging process itself.
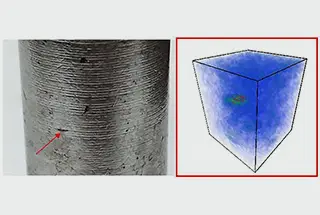
Raw material defects include residual shrinkage holes, inclusions in steel, subcutaneous bubbles, shrinkage pores, white spots, and laminations. These defects may already exist in the steel before forging, and if they are not removed or treated, they may lead to the formation of cracks during the forging process.
Improper handling during the forging process is also a significant cause of forging cracks. This includes overheating, overburning, or too low a final forging temperature, as well as too rapid cooling after forging. These factors can all lead to excessive internal stress in the forging, thereby triggering cracks.
To prevent the occurrence of forging cracks, various measures can be taken. For instance, the selected billet should be thoroughly cleaned of all surface defects and undergo adequate high-temperature homogenization treatment to eliminate residual internal stress and grain segregation, thereby enhancing the metal’s plasticity.
Moreover, improving the forging process, such as properly increasing the fillet radius, reducing shear stress, and limiting deformation areas in the final stage of die forging, can also help prevent the formation of cracks.
For existing forging cracks, certain methods can be employed for repair. For example, submerged arc welding is an effective crack repair technique, capable of automatically completing the welding process under the flux layer, effectively repairing cracks.
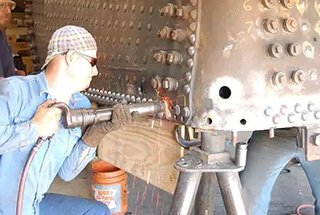
Additionally, surface transverse cracks on large forgings can be removed after detection through flame cleaning to prevent the cracks from enlarging in subsequent forging.
Cracks produced during the quenching and heating process have significant differences in nature and morphology compared to those formed during the forging and heating process.
For structural steel, the heat treatment temperature is generally much lower than the forging temperature.
Even for high-speed steel and high-alloy steel, the heating and insulation time is much shorter than that of the forging temperature. Early cracking can occur during the heating process as a result of excessively high heat treatment temperatures, producing cracks distributed along coarser grain boundaries.
When the heating speed of the part is too fast, early cracking can also occur, with slight decarburization on both sides of the crack, but oxidation scales are present inside and at the tail of the crack.
Sometimes, due to instrument malfunction, extremely high temperatures can cause the material’s coarse-grained structure, with the crack distributed along the tubby crystal boundary.
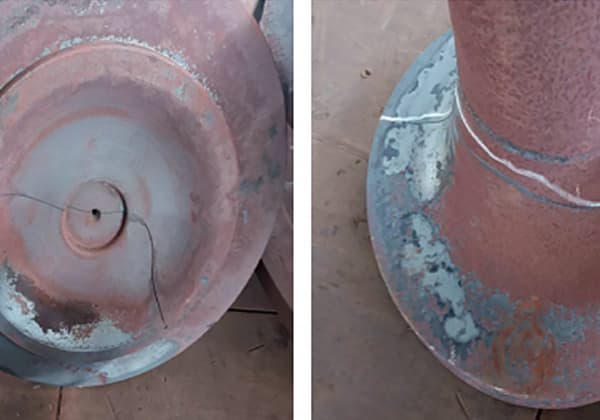
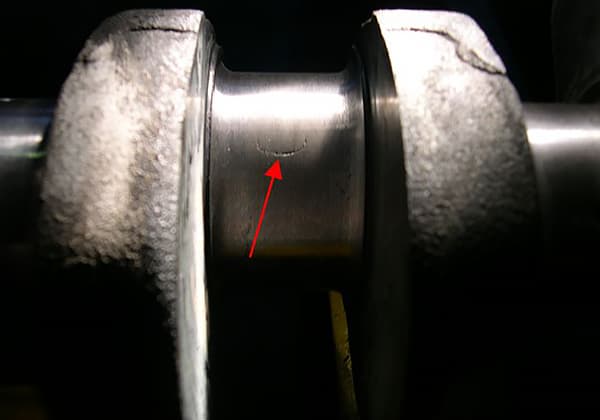
A typical example of quenching cracks is as follows:
Under a microscope with a 500X magnification, the crack appears serrated, with a wide starting end and a small ending fracture. There is no abnormal metallurgical inclusion or decarburization present at the crack, which extends in a serrated manner, having typical characteristics of quenching cracks.
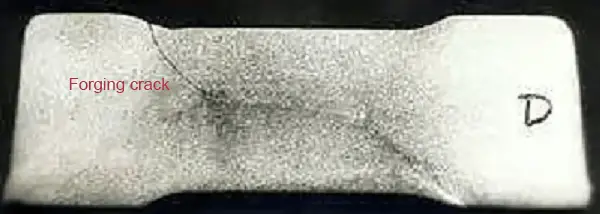
Causes of forging cracks:
During the forging process, steel may crack due to defects on the surface or inside the material, such as hairline cracks, sand holes, inclusions, subsurface bubbles, shrinkage holes, white spots, or laminations.
Poor forging processes or improper operations such as overheating, over-burning, or too low final forging temperatures, as well as too fast cooling after forging, can also cause cracking of forgings.
Causes of heat treatment cracks:
Quenching cracks are macroscopic cracks primarily caused by macroscopic stresses. In actual production, steel workpieces are often due to the structural design being unreasonable, improper selection of materials, insufficient temperature control during quenching, or inappropriate cooling rates, which on the one hand increases the internal stress during quenching, leading to the expansion of the formed microcracks to form macroscopic quenching cracks.
On the other hand, increasing the number of microscopic cracks decreases the material’s resistance to brittle fracture SK, increasing the likelihood of quenching crack formation.
There are many factors that affect quench cracking, and here we only introduce a few common cases encountered in production.
(1) The indicated temperature of the instrument is lower than the actual temperature of the furnace, resulting in a higher quenching temperature, causing the workpiece to overheat and crack during quenching. The metallographic structure of overheated quenched cracking always contains coarse grains and coarse martensite.
(2) The actual carbon content of the steel is higher than the content specified by the steel grade. When quenched according to the normal quenching process of the original grade, it is equivalent to increasing the quenching temperature of the steel, which is easy to cause overheating and grain growth of the parts, and increase the stress during quenching, causing cracking.
It is important to distinguish whether it is quenching cracks, tempering cracks, forging cracks, or grinding cracks, in order to accurately identify which process the cracks occurred in and analyze the reasons for their formation.
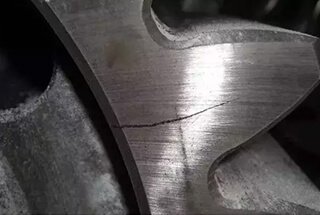
Firstly, pay attention to the differences in the morphology of quenching cracks and grinding cracks. To distinguish between quenching cracks and grinding cracks, which may not be detected during quenching but are found after grinding, pay attention to the shape of the cracks, especially the direction of crack development.
Grinding cracks are perpendicular to the grinding direction, appearing in a parallel line shape or a tortoise shell pattern. Grinding cracks are shallower while quenching cracks are generally deeper and larger.
Quenching cracks are not related to the grinding direction and often appear as straight knife-cut-like cracks.
Secondly, pay attention to where the cracks occur. Sharp corners, the edges of holes, inscriptions, stamping or mechanical surface defects, and other areas where cracks occur are mostly quenching cracks.
Thirdly, distinguish quenching cracks from forging cracks or cracks caused by other conditions by observing the fracture surface of the part.
If the crack surface is white, dark white, or light red (caused by water rust during water quenching), it can be determined that it is a quenching crack. If the crack surface is dark brown, with even oxide scale, it is not a quenching crack; it is a pre-existing crack that was formed during forging or rolling and has been expanded during quenching.
Since quenching cracks are formed below the MS point, their surfaces cannot be oxidized.
Fourthly, in the microstructure, quenching cracks fracture along grain boundaries. If they are not along grain boundaries but within the grains, they are fatigue cracks.
Fifthly, if there is decarburization around the cracks, it is not a quenching crack, but a pre-existing crack before quenching because quenching cracks are produced during quenching and decarburization does not occur.
The latest techniques for preventing forging cracks primarily include the following:
Optimizing material processing: By improving issues like the transverse segregation of harmful low-melting-point impurities such as S, P, Sb, Bi, Pb, Sn in the forging module, or the presence of transverse micro-cracks, the creation of quenching cracks can be effectively prevented. This involves adjusting the chemical composition and heat treatment of the material before forging to minimize the impact of these impurities.
Improving forging processes: For the quality control of aluminum alloy die forging folding and cracking, the principle of prevention is emphasized and a method combining process technology and production management is proposed. This means that during the forging process, focus should be placed on the selection of equipment, the design of the mold, and the optimization of forging parameters to reduce the occurrence of cracks.
Adopting advanced detection techniques: By performing rapid and accurate detection on the forgings, potential crack issues can be discovered in time. This includes observing the microstructure of the material with high-precision microscopes, and using X-rays or other non-destructive testing methods to assess the overall quality of the material. This allows for intervention before a crack forms.
Implementing strict quality control measures: In forging production, a comprehensive quality management system should be established. From the selection of raw materials to the inspection of finished products, every step should be carried out strictly according to standards. This includes regular maintenance and calibration of forging equipment, as well as training for operators to ensure they can correctly understand and execute the forging process.
To accurately identify and evaluate the impact of raw material defects on crack formation during the forging process, it is first necessary to understand the main defects of the raw materials and their impact on the quality of the forgings. Internal or surface defects of the raw materials, such as composition and structure segregation, non-metallic inclusions, dendrite segregation, and porosity, can all potentially affect the forming process and final quality of the forgings. Therefore, identifying these defects is the first step in evaluating their impact on crack formation.
Next, we can analyze the impact of forging parameters (such as speed) on the formation mechanisms of typical defects such as folding defects through finite element simulation and experimental design. This will further enable us to assess the potential risks these defects pose to crack formation.
Additionally, using ultrasonic control methods and eddy current techniques can effectively evaluate the depth of surface and internal cracks in metal products, providing a basis for the quantitative characterization of crack defects.
Image processing technology is also an important means for identifying and evaluating crack formation. Crack detection and marking methods implemented through software like Matlab can help identify potential crack areas for subsequent analysis.
Furthermore, methods based on deep learning can further promote the automated measurement of crack width, thereby more accurately assessing the potential risk of structural damage.
During the forging process, to effectively reduce the cracks caused by overheating, burning, or too low a final forging temperature, the following specific operations can be adopted:
Control the heating speed and time:
Use rapid heating methods and minimize the heating time at high-temperature stages to avoid decarburization defects and overheating defects. This helps to improve the plasticity of the metal, making it easier to undergo large deformations without cracking.
Strictly control the initial forging temperature and final forging temperature:
For different types of steel, such as carbon structural steel and alloy tool steel, the initial forging temperature should be adjusted according to their carbon content. Especially for stainless steel, the appropriate initial forging temperature should be selected and the final forging temperature should not be lower than 950°C to avoid forging cracks.
Protect the billet before heating:
When conditions permit, apply a protective layer (such as glass powder) to the billet before heating to reduce decarburization and prevent overheating and burning.
Ensure sufficient deformation and correct operating techniques:
During the forging process, the final forging temperature of the last fire should be strictly controlled, and sufficient deformation should be ensured to avoid cracking. At the same time, good operating techniques of the forging process should be paid attention to avoid cracks caused by improper operation.
For the flame cleaning method of transverse cracks on the surface of large forgings, improvements and optimizations can be made in the following areas:
Adopt advanced flame cleaning technology: Based on the analysis of the SMS-20 flame cleaning machine, flame cleaning technology can effectively remove surface defects. By optimizing the cleaning depth, the cleaning efficiency and quality can be improved. Therefore, the introduction of more efficient and advanced flame cleaning equipment and technology, such as automatic flame cleaning systems, can significantly improve cleaning results.
Optimize forging process: Since F92 material is prone to surface crack defects during the forging process, especially when the content of Cr and W alloy is high, the traditional flame “scanning” efficiency is very low. Therefore, optimizing the forging process, such as adjusting forging parameters and improving mold design, can to some extent reduce or avoid the occurrence of transverse surface cracks.
Combine with other cleaning technologies: Although flame cleaning is an effective surface treatment method, it can also be considered to be used in combination with other cleaning technologies to achieve better cleaning results. For example, pickling or shot blasting cleaning processes can further improve surface quality. This multi-technology combination method may have better cleaning effects for certain specific surface defects.
Application of intelligent control technology: With the development of intelligent control technology, applying these technologies to the flame cleaning process can achieve more precise control and operation, thereby improving the accuracy and efficiency of cleaning. This includes real-time monitoring of the cleaning process and automatic adjustment of cleaning parameters.
