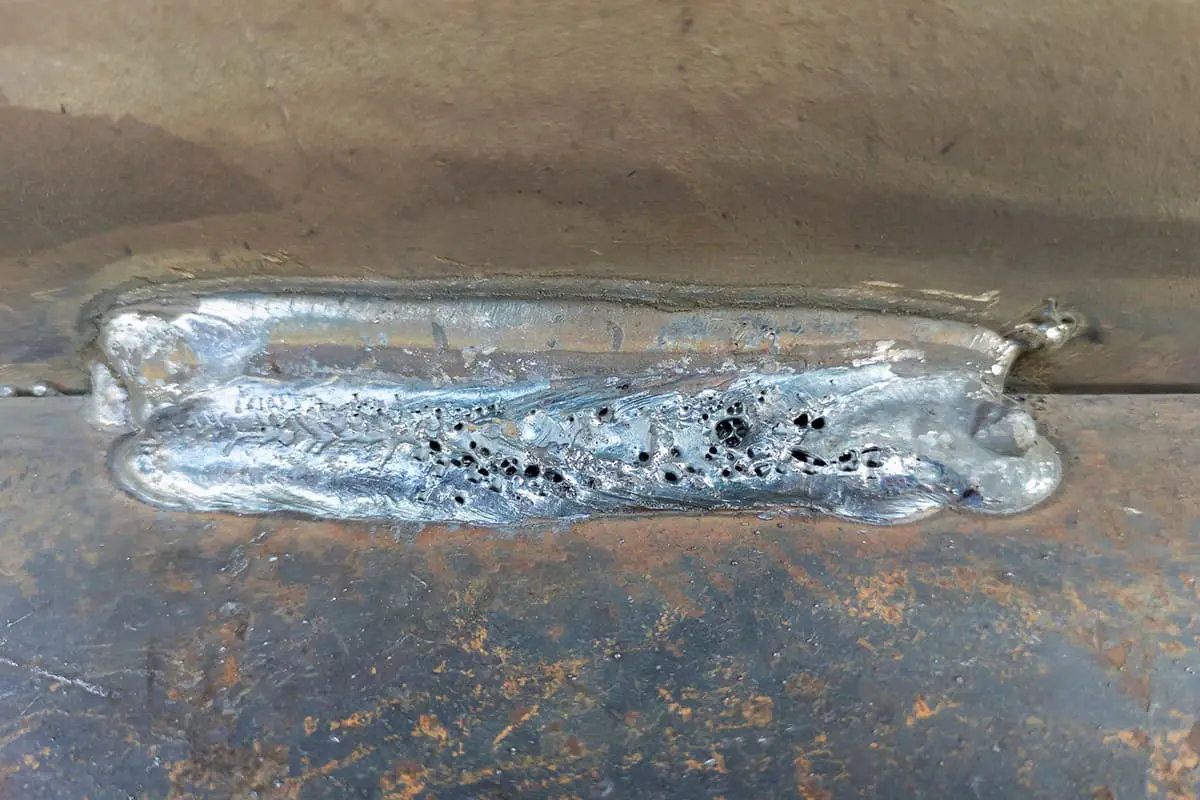
Preventing Argon Arc Welding Porosity: Causes and Solutions
Why does argon arc welding sometimes produce pores, and how can we fix it? Welding porosity, often caused by impurities, improper gas flow, or incorrect technique, can weaken welds and…
Are you struggling to achieve flawless argon arc welding results? This article breaks down the critical steps you need to master, from arc striking techniques to torch holding methods. Discover how to control the molten pool, perfect your arc operation, and ensure seamless welding wire feeding. Follow these practical tips to enhance your welding quality and avoid common pitfalls. Dive in to refine your skills and ensure every weld meets the highest standards.
The key steps of argon arc welding can not be ignored:
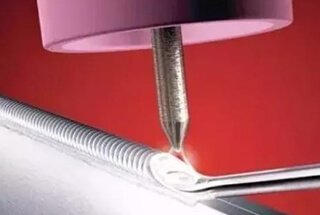
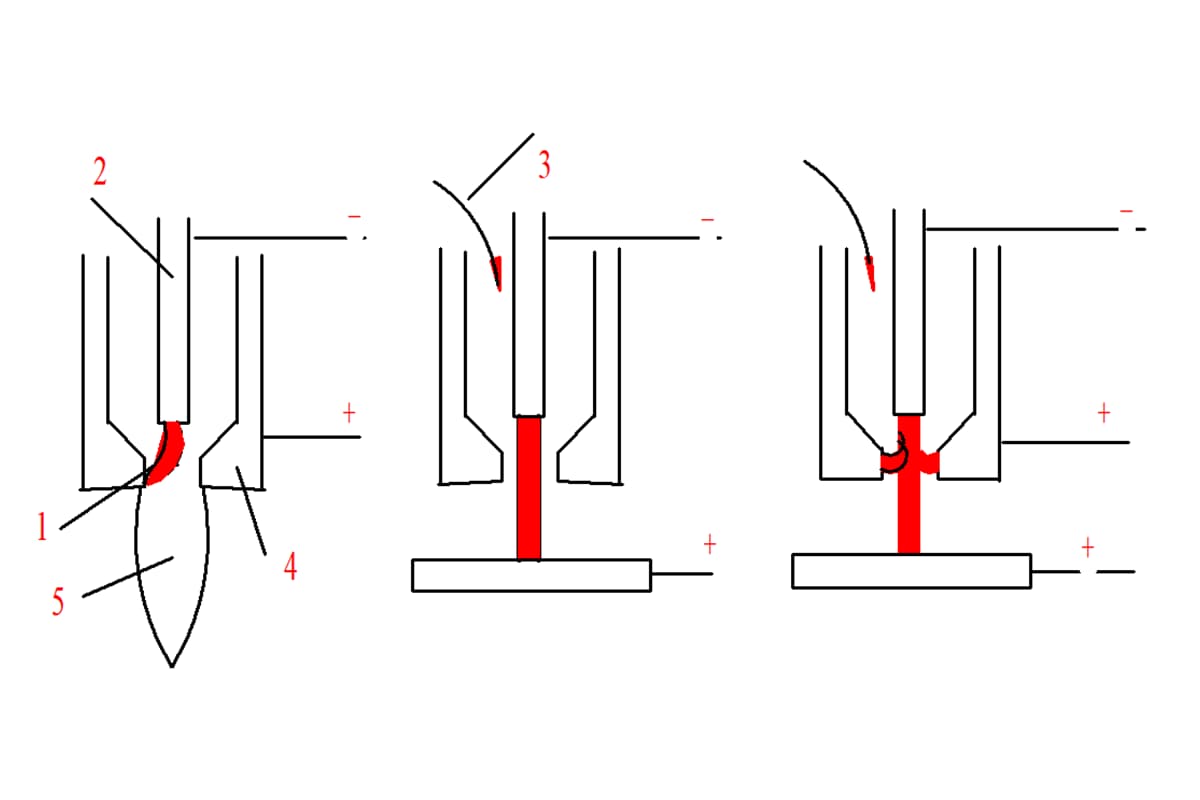
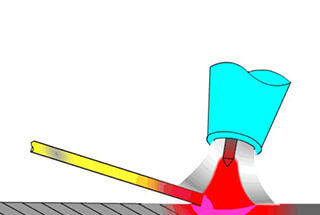
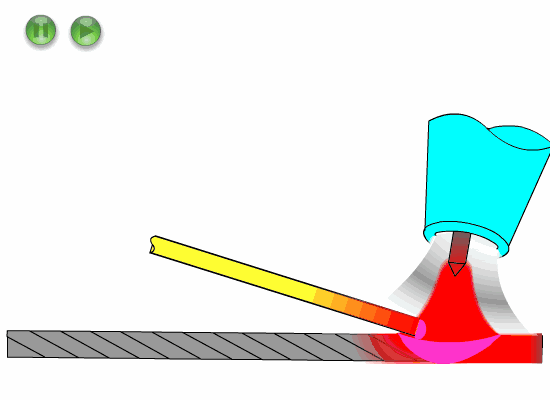
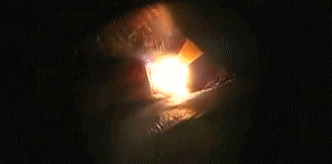
There are three arc striking methods for argon arc welding: scratch arc striking, lifting arc striking and high-frequency arc striking.
Scratch and strike arc refers to the scratch and strike between tungsten electrode and workpiece.
At the same time, short-circuit current will heat tungsten electrode, and the arc can be ignited by lifting the welding gun.
This arc striking method has the advantages of simple control and convenient operation. Its disadvantage is that it is easy to clamp tungsten and pollute the workpiece.
Lift the arc striking, that is, short circuit the tungsten electrode and the workpiece first during arc striking, and the short-circuit current is controlled to be very small.
Heat the tungsten electrode. When the tungsten electrode is lifted away from the workpiece, the current is switched to the arc striking current in a very short time to ignite the arc.
The utility model has the advantages of avoiding high-frequency interference and reducing tungsten pollution of the workpiece.
High frequency arc ignition uses high frequency and high voltage generator to generate high voltage between tungsten electrode and workpiece, breakdown air discharge and ignite arc.
Most of the arc striking methods we use are breakdown type, that is, holding the welding torch perpendicular to the workpiece, keeping the tungsten electrode at a distance of 3-5min from the workpiece, connecting the power supply, and discharging in the breakdown gap under the action of high voltage, high frequency or high voltage pulse, ionizing the protective gas to form ion flow and igniting the arc.
This method ensures that the tungsten extreme part is intact, the burning loss is small and the arc striking quality is good, so it is widely used.

In the final analysis, controlling the shape and size of the molten pool is to control the welding temperature: the temperature has a great impact on the welding quality, and various welding defects are caused by improper temperature.
Thermal crack, undercut, crater crack, depression, element burning loss, bump, etc. are all caused by too high temperature;
Cold cracks, air holes, slag inclusion, incomplete penetration and incomplete fusion are all caused by insufficient welding temperature.
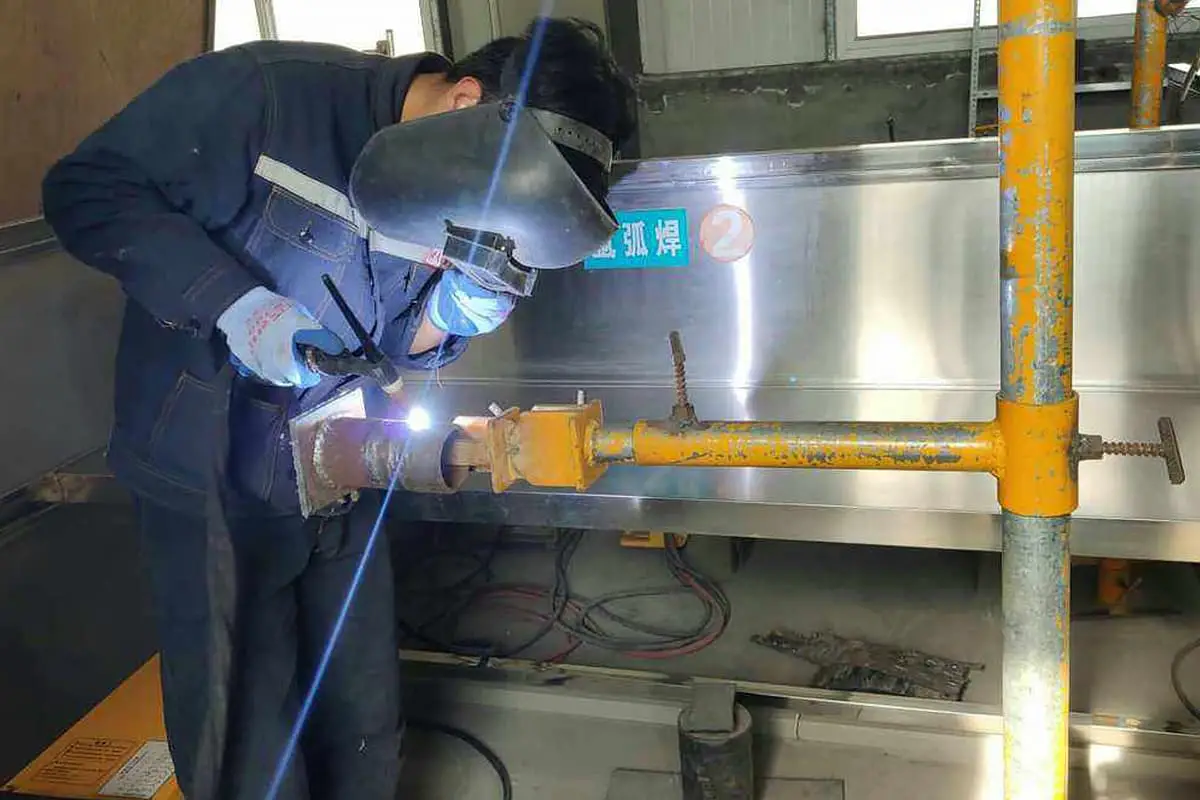
There are certain requirements and rules for arc operation: the included angle between the torch axis and the welded surface is called the torch inclination, which directly affects the heat input, protection effect and operation field of vision.
Generally, the protection effect is the best when the torch inclination is 70 °- 85 °and 90 °.
However, the protective air flow ejected from the welding torch deviates backward with the increase of the moving speed of the welding torch, which may make the molten pool not fully protected, so the welding speed cannot be too fast.
GTAW generally adopts left welding method.
Hold the torch handle with the thumb and index finger of your right hand, and the other three fingers touch the workpiece as guidance.
Press the welding nozzle slightly on the weld, and shake the arm greatly for welding.
Advantage:
Because the welding nozzle is pressed on the weld and the welding handle is very stable in the operation process, the weld has good protection, good quality, beautiful appearance and high product qualification rate.
In particular, overhead welding is very convenient. When welding stainless steel, you can get a very beautiful appearance color.
Disadvantages:
It is difficult to learn. Because the arm swings greatly, it is impossible to weld at obstacles.
The welding nozzle gently rests or does not rest on the weld, the little finger or ring finger of the right hand also rests or does not rest on the workpiece, the arm swing is small, and the welding is carried out by dragging the welding handle.
Advantage:
Easy to learn and adaptable.
Disadvantages:
The forming and quality are not good, especially the overhead welding is not easy to weld, so it is difficult to get the ideal color and forming when welding stainless steel.
Hold the welding wire with the middle finger of the left hand at the top and the ring finger at the bottom.
Pinch the welding wire with the thumb and index finger and move forward into the molten pool. Then loosen the thumb and index finger and move forward, and then pinch the welding wire.
In this way, the whole welding wire can be transported without stopping.
Welding wire feeding angle and feeding mode are related to proficiency, which directly affects the geometry of weld.
The welding wire shall be fed at a low angle, generally 10 ° – 15 °, usually no more than 20 °.
This helps to cover the melting end with protective gas and avoid collision with the tungsten electrode, so as to shorten the distance from the welding wire to the molten pool in drop shape.
The wire feeding action shall be light and do not stir the gas protective layer to avoid air intrusion.
When the welding wire enters the molten pool, it shall avoid short circuit in contact with the tungsten electrode to prevent the tungsten electrode from burning and falling into the molten pool, resulting in tungsten inclusion in the weld.
The end of the welding wire shall not extend into the arc column, that is, between the weld pool and the tungsten electrode.
Otherwise, under the action of high temperature of the arc column, the welding wire will melt violently and drip into the weld pool, causing splash and banging sound, thus damaging the stable arc combustion of the arc, resulting in internal pollution of the weld pool and poor appearance of the weld, gray black and not bright.
The melting of welding wire into the molten pool can be roughly divided into five steps:
A) The welding torch is perpendicular to the workpiece and ignites the arc to form a molten pool. When the molten pool is heated by the arc to be white and bright and will flow, it is necessary to prepare to feed the welding wire.
B) The torch moves slightly backward and tilts 10 ° – 15 °.
C) Force the inner edge of the molten pool and feed the end of the welding wire at about 1 / 3 of the molten pool.
Contact and dissolve the welding wire by the heat of the molten pool. Do not stir the molten pool like gas welding (BC at the same time).
D) Pull back the welding wire, but its end does not leave the protection zone, and remains separated from the front edge of the molten pool, ready to add the welding wire again.
E) The welding torch moves forward to the front of the molten pool to form a new molten pool.
(Repeat CDE until the welding is finished)
Wire feeding can be divided into external wire filling, internal wire filling and wire following methods,
It can be used for backing and filling. A large current is used.
The welding wire head is on the front of the groove.
The welding wire is pinched with the left hand and continuously sent to the molten pool for welding.
The groove gap is required to be small or no gap.
Advantage:
Because the current is large and the gap is small, the production efficiency is high and the operation skills are easy to master.
Disadvantages:
When it is used for backing, because the operator can’t see the melting of the blunt edge and the reinforcement of the reverse side, it is easy to produce incomplete fusion and can’t get the ideal reverse side forming.

The internal filler wire can only be used for backing welding.
Use the left thumb, index finger or middle finger to cooperate with the wire feeding action, and clamp the welding wire with the little finger and ring finger to control the direction.
The welding wire is close to the blunt edge on the inner side of the groove and melted together with the blunt edge for welding.
The groove gap is required to be greater than the diameter of the welding wire. If it is a plate, the welding wire can be bent into an arc.

Advantage:
Because the welding wire is on the reverse side of the groove, the blunt edge and the melting of the welding wire can be clearly seen, and the reinforcement on the reverse side can also be seen by the residual light of the eyes, so the weld fusion is good;
Back reinforcement and lack of fusion can be well controlled.
Disadvantages:
The operation is difficult, and the welder is required to have more skilled operation skills;
Because the gap is large, the welding quantity increases accordingly, the gap is large, the current is low, and the working efficiency is slower than that of external wire filling.
Arc stopping is to stop halfway for some reason, and then continue welding.
The correct arc stopping method is to use the method of arc stopping after the casting accelerates the arc running speed (reducing the molten pool area), so that there can be no arc crater and shrinkage cavity, which creates conditions for the next arc striking and continuous welding.
The length of accelerating arc running is about 20mm.
During re arc striking welding, after the molten pool is formed, press back 1-2 ripples, add no or less welding wire at the starting point of the joint, and then turn to normal welding.
In order to prevent pores and ensure weld quality, the welding speed at the starting point or joint shall be appropriately slowed down.

Arc extinguishing, also known as arc extinguishing, is a necessary method for welding termination. Arc stopping is very important and should be paid great attention to.
If the arc is not stopped properly, it is easy to cause crater cracks, shrinkage cavities and other defects
A) The welding current attenuation method uses the attenuation device to gradually reduce the welding current, so as to gradually reduce the molten pool, so that the base metal can not melt, so as to achieve the purpose of no shrinkage cavity at the arc stop.
Ordinary GTAW welding machines are equipped with attenuation device.
B) Increasing welding speed method at the end of welding, the forward moving speed of welding torch is gradually accelerated, and the feeding amount of welding wire is gradually reduced until the base metal does not melt.
The basic point is to gradually reduce the heat input and overlap the weld by 20-30mm.
This method is most suitable for circumferential seam without crater and shrinkage cavity.
C) When the multiple arc extinguishing method is terminated, the welding speed slows down, the caster angle of the welding torch increases, and the arc is lengthened to make the arc hot.
It is mainly concentrated on the welding wire, and the feeding amount of the welding wire is increased, the arc pit is filled, and the weld is increased.
After arc extinguishing, the arc is ignited immediately, repeated two or three times, so that the welding wire can continue to be supplied to the molten pool during solidification, so as to gradually cool the arc stop.
However, after multiple arc quenching, the arc closing position is often high, and the increased weld at the arc closing position needs to be flattened.
D) Arc extinguishing plate is commonly used in flat plate butt joint by arc extinguishing plate method.
The arc extinguishing plate shall be removed and leveled after welding.
Practical proof:
The current attenuation method is the best way to stop the arc with attenuation device, and the increasing welding speed method is the best way to stop the arc without attenuation device, which can avoid arc crater and shrinkage.
The welding torch cannot be removed immediately after arc extinguishing.
It should stay at the arc stopping place for 2-5min, and the arc stopping part under high temperature should be protected from oxidation with lag gas.

As the founder of MachineMFG, I have dedicated over a decade of my career to the metalworking industry. My extensive experience has allowed me to become an expert in the fields of sheet metal fabrication, machining, mechanical engineering, and machine tools for metals. I am constantly thinking, reading, and writing about these subjects, constantly striving to stay at the forefront of my field. Let my knowledge and expertise be an asset to your business.