Stainless Steel Kitchen Sink Manufacturing Process Explained
Have you ever wondered how the sleek, shiny stainless steel sinks in your kitchen are made? This article will take you through the fascinating journey from raw steel sheets to the final polished product, revealing the intricate steps and machinery involved. Get ready to explore the detailed process and discover what makes these sinks both durable and beautiful.
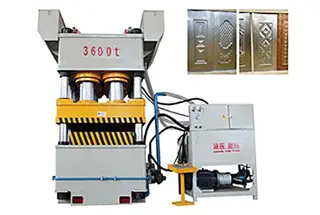
Among them, the drawing machine requires one 400T and one 500T drawing press machine.
The 400T drawing press machine is used for drawing, and the 500T press is used for forming.
One 200T hydraulic press will be needed for edge trimming.
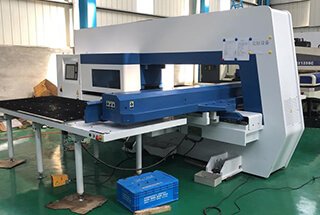
The power press is mainly used for hole punching.
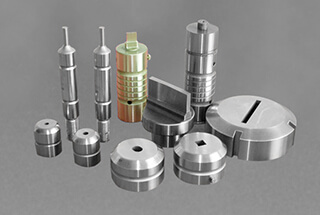
The 4 sets of molds are a drawing die, a forming die, a trimming die, and a punching die, respectively.
Now that we have a brief understanding of stainless steel sinks and their making equipment, how are they made?
Let’s dive into the production process of stainless steel sinks.
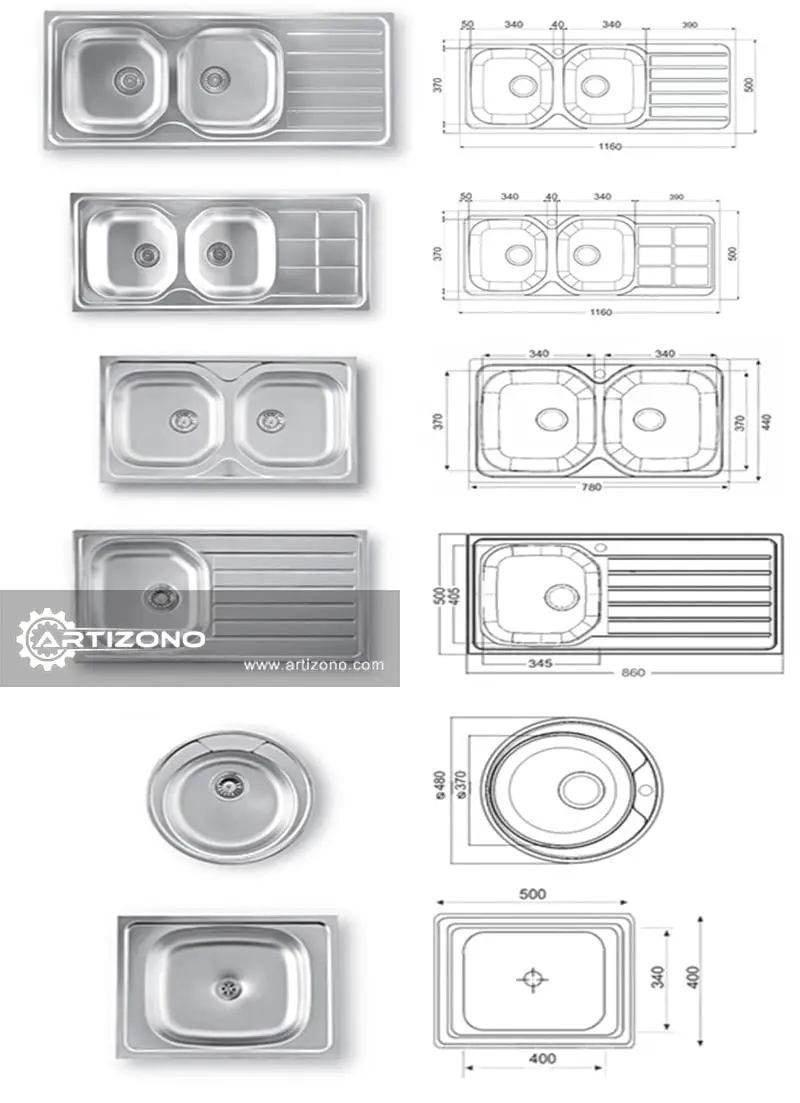
#1. Purchasing of Raw Material (0.8-1.5mm sheet metal)
The sink factory purchases steel plates of different widths and thicknesses according to the various production requirements of the sink.
The thickness of the sheet metal commonly used in the manufacture of stainless steel sinks is between 0.8mm and 1.5mm.
The sheet metal is delivered to the sink factory in coils by weight.
Usually, the maximum width of the uncut steel sheet is 1220mm, and the length is almost unlimited.
#2. Laminating
The ductility of the steel sheet is limited.
To avoid cracking and damage to the steel sheet during the drawing process, it is necessary to apply a laminating film to the steel sheet at the initial stage.
The coating covers only one side of the steel sheet, and the side with the coating film will face the mold in the subsequent drawing step.
The film coating can be applied before cutting or after cutting.
According to the different design length of the water sinks, the long steel sheet needs to be cut into segments by a sheet metal cutting machine to meet the size requirements of the blanking.
From the picture shown below, you can see that the workers complete the film coating by controlling the roller switch to pass the protective film and the steel sheet through the rolling zone at the same time.
When the coated steel sheet passes through the guillotine, the worker presses the guillotine switch as needed to cut the steel sheet to the required length.
#4. Corner Notching
The sheet, after cutting, is now in a regular rectangular shape.
To roughly conform to the shape of the sink, it is also necessary to feed the sheet into the shearing machine for corner notching.
The sheet metal, after corner notching, is generally polygonal and sometimes has arc edges.
#5. Oiling
Apply the drawing oil evenly to both sides of the sheet metal after coating and cutting.
The drawing oil will help the sheet to be evenly stressed, reduce the chance of tensile cracking, and extend the life of the mold and press machine.
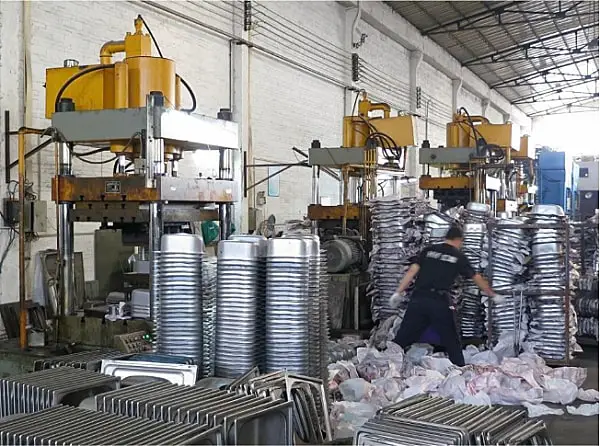
#6. First-time Drawing
Place the metal sheet on the worktable of the drawing press machine.
There are openings on the upper and lower laminated plates on the workbench.
The product mold is located in the opening of the lower plate of the workbench (red-shaded in the following picture).
After pressing the motor switch, the upper plate of the hydraulic press worktable is lowered, and the entire worktable sinks.
During the sinking process, the horizontal position of the mold remains unchanged, so that the steel plate is forced upwards to complete the shape drawing.
The first drawing depth must be 80% or more of the total design depth.
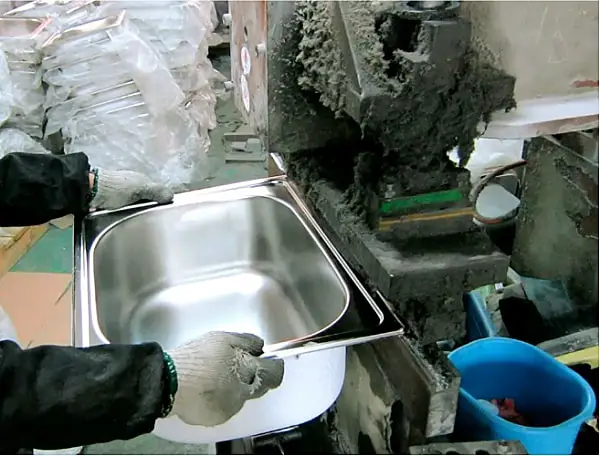
#7. Cleaning
Take down the initially formed basin and clean the workbench contaminated with the drawing oil.
The water sink after the first drawing process will be sent to the cleaning station to peel off the film, and the residual drawing oil will be washed away to prepare for the annealing process.
In the drawing process, if the design depth of the sink is less than 160 mm, the desired depth can be achieved in one drawing.
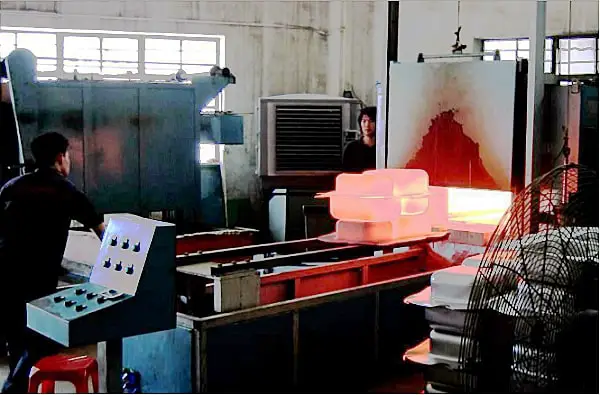
When the depth of the water sink reaches 180 mm to 250 mm, the probability of the stainless steel sheet rupturing by one drawing is greatly increased. To avoid cracking and ensure the quality of the sink, an annealing process is required.
To meet the demand for deep drawing, annealing treatment and secondary drawing are currently required.
The annealing treatment restores the activity of the stainless steel sheet that is highly strained during the first-time drawing process.
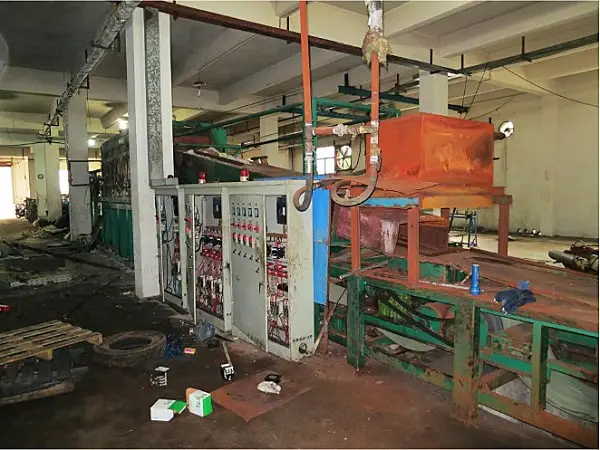
The annealing line itself is a 20-meter-long high-temperature line, with a furnace temperature of approximately 1150℃.
Entrances and exits are located on both sides, and the water sinks are transported by a cable-type crane lock or a conveyor belt.
The line can process 30 pieces of water sinks simultaneously.
The annealing process also includes demagnetization, which eliminates the magnetic properties of stainless steel caused by drawing.
Many sink plants do not have their own annealing line and outsource the process to a third-party annealing shop.
Sometimes the sink plant uses an annealing furnace to fulfill its own replacement requirements.
#9. Second-time Drawing
The annealed water sink is put through a second drawing process using a mold and a hydraulic press.
The second drawing must be fully stretched to the designed depth.
#10. Trimming
After the second drawing process of the water sink, there is no longer any shrinkage in the edge of the steel sheet.
At this stage, it is necessary to remove any excess trim from the finished product.
When cutting the edge, it is essential to reserve the installation position of the stiffener rib above the counter basin.
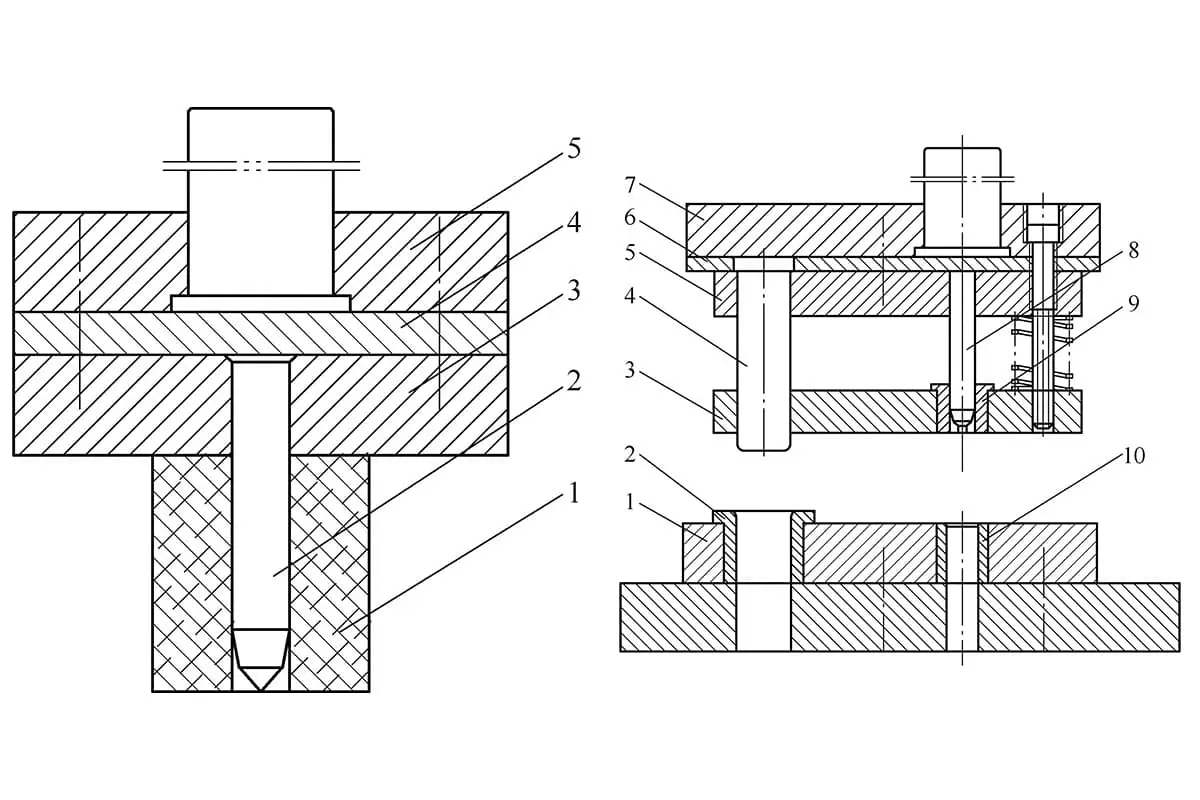
#11. Hole Punching
The drainage holes and overflow holes are punched successively on a special mold by the punching machine.
Depending on the actual conditions of the sheet and punching equipment, it may be necessary to remove any burrs on the cut-off plane.
#12. Welding
If it is a twin-tank roll welding basin or bottom welding basin, it needs to be welded to the upper plate of the watering plate after hole punching.
Roll welding is usually done by CNC welding, but it can also be hand-soldered by workers.
If it is a butt welding basin, it is necessary to perform butt welding on both sides of the basin.
A distinguishing feature of the butt welding basin is the weld line between the two sides of the basin.
In addition, the current common surface treatment processes include the following FOUR types:
sanding (drawing)
sandblasting (electrolysis)
polishing (mirror)
embossing
Here, the sanding (drawing) process is specifically introduced.
Grinding is divided into three or four steps depending on the difference between the basin and the equipment.
The first part that needs to be polished is the bottom of the sink.
The grinding of the sink wall is then carried out.
Depending on the degree of automation of the sink plant, the following process sometimes exists to alleviate the requirement for the workers’ grinding skills.
Since the two adjacent faces are polished in different directions, chaotic lines are likely to occur at the edges where the textures meet.
A grinding wheel will be used to remove any disorderly lines between the two vertical faces.
At the end of the grinding process, the upper plate is ground to remove the welding spot, weld lines, and surface flaws visible in the basin.
#15. Hole Opening
Excavation of the hole of the water faucet at the position according to the requirements of the order.
This process has a high degree of freedom and may be skipped directly according to the order requirements, or it may occur before any process after welding.
#16. Marking
The marking of the stainless steel sink mainly includes the following two methods: laser mark and embossing mark.
Push the sink completely into the bayonet position to ensure consistent print position.
Laser Mark
Laser etching is used for marking.
In addition to fully automated laser marking, there is also a lower-cost manual positioning laser marking (as shown in the following picture).
Place the semipermeable membrane with the brand logo on the designated marking position and use a handheld laser emitter to illuminate it at zero distance.
The laser passes through the light-transmissive portion of the semipermeable membrane to achieve cauterization on the stainless steel surface.
#17. Restoration
Any minor damage that occurs at each production stage, but still has commercial value, is sent to the repair site by hand before the spraying process.
#18. Spray Coating
A bottom spray treatment is performed.
There are three purposes for spraying:
To make the thin and light sink gain weight;
To cover the burning traces caused by annealing;
To prevent condensation in the kitchen environment.
However, most sink manufacturers only apply paint during spraying, and it does not have an anti-condensation function.
In addition to spraying, pickling can also remove burning spots caused by annealing.
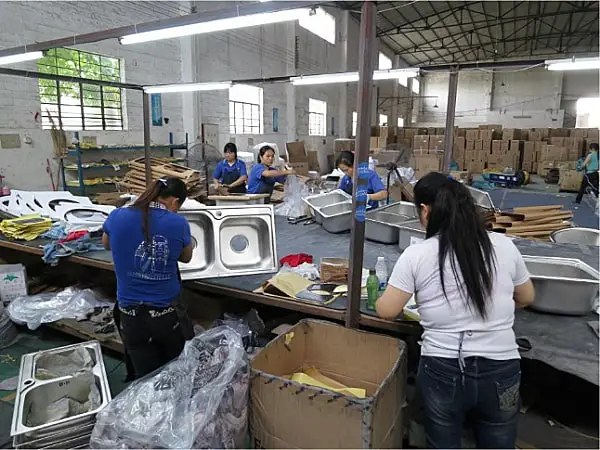
#19. Cleaning & Packing
The cleaning work includes removing the residual drawing oil, dirt, and spray from the front of the sink, as well as any scraps from the grinding wheel and stainless steel, fingerprints, and other dust.
The sink can be packaged in brackets, large boxes, or even retail packaging according to the requirements of different customers.
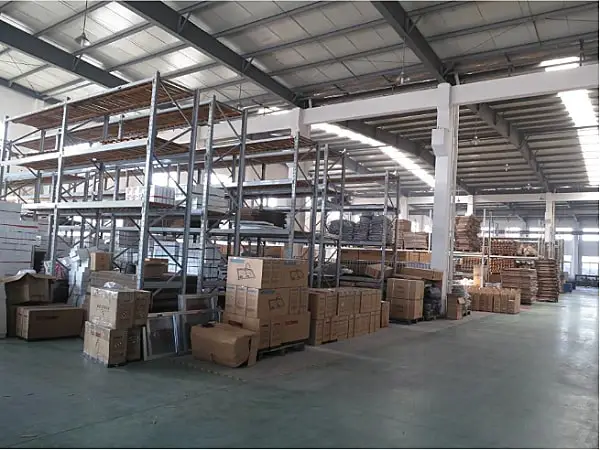
#20. Stocking
Finally, the product is placed in the warehouse and awaits delivery to the location specified by the buyer.
Working Video of Stainless Steel Sinks Making Process
As the founder of MachineMFG, I have dedicated over a decade of my career to the metalworking industry. My extensive experience has allowed me to become an expert in the fields of sheet metal fabrication, machining, mechanical engineering, and machine tools for metals. I am constantly thinking, reading, and writing about these subjects, constantly striving to stay at the forefront of my field. Let my knowledge and expertise be an asset to your business.
Ever wondered how intricate designs are embossed onto steel doors? A steel door embossing machine is the answer. This article delves into different types of these machines, from frame embossing…
Have you ever wondered what makes one metal sheet more suitable for stamping than another? Understanding the properties and specifications of various stamping materials is crucial for anyone in the…
Have you ever wondered how intricate metal parts are made with precision? This article explores the fascinating world of thread tapping and flanging dies, revealing the secrets behind their design…
Have you ever wondered how to calculate the deformation in hole flanging? Understanding flanging coefficients is crucial for precision in metalworking. This article dives into the key factors influencing these…
Imagine extending the lifespan of your molds significantly—what impact would that have on your production efficiency and costs? This article explores 12 innovative technical measures to improve mold life, from…
Ever wondered how to ensure your CNC punch operates flawlessly? Correct usage not only guarantees high-quality parts but also maximizes the machine's lifespan. This article covers everything from essential pre-use…
Selecting the right turret punch tooling can significantly impact your production efficiency and product quality. Are you struggling with burrs or die wear in your sheet metal processing? This guide…
Ever wondered why your stamped metal parts sometimes come out flawed? Choosing the right stamping oil could be the key. This article dives into how to select the best stamping…
Ever wondered how massive metal parts are shaped with pinpoint precision? Enter the world of the Four-Column Hydraulic Press. This powerful machine uses hydraulic pressure to mold materials like metal…