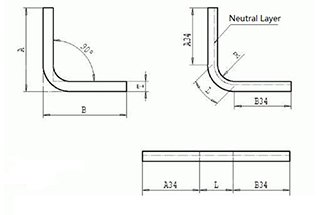
Bend Allowance Formula: Calculator & Charts
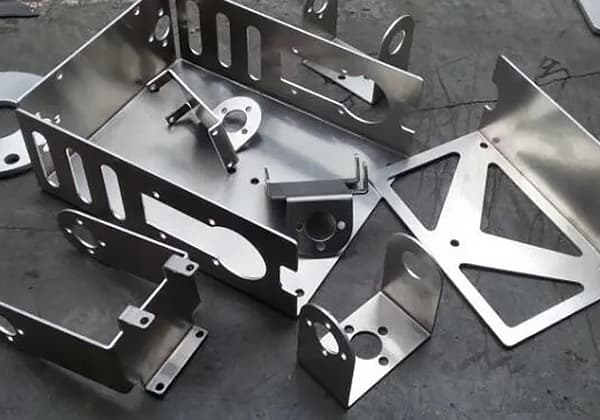
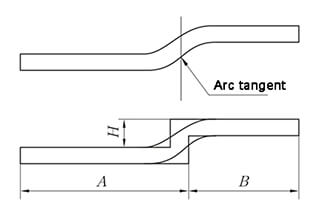
Have you ever wondered how to precisely calculate the bending allowance for your metal fabrication projects? In this blog post, we'll explore the fascinating world of bend allowance formulas and…
Have you ever considered what holds up the street lights that guide our way home? In this blog, we’ll explore the fascinating world of light poles, from their materials and standards to the intricate production process. Get ready to uncover the hidden backbone of our urban landscapes!
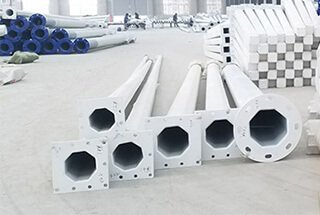
If you say that coffee is accompanied by cube sugar, then the street light is accompanied by its light pole. The light pole, which is an essential component of the street light, is often overlooked despite people’s focus on the brightness of the street light’s bulb. Today, I will share the story of the light pole.
First, let’s examine the standards that should be used for street light poles.
Light Pole Height:
Generally, workers survey and assess different environments to determine the appropriate parameters for the poles, based on the brightness of the LED light source.
Application Scenario: Most scenic areas use solar garden lights, which require lower lamp pole heights.
Light Pole Material:
For instance, steel structures are commonly used along roadsides to ensure the sturdiness of the lamp poles. However, in scenic areas, simple light poles are sufficient since collisions and other incidents are unlikely to occur.
These standards are a combination of strict industry requirements and practical knowledge gained from years of production experience by companies.
Note: The primary consideration when selecting a light pole should be safety.
Light poles can be divided into iron light poles, FRP light poles, cement light poles, and aluminum alloy light poles according to their materials.
The advantages of iron light pole
The disadvantages of iron light pole
The advantages of FRP light pole:
Disadvantages of FRP light poles:
Advantages of cement light pole:
Disadvantages of cement light poles:
Advantages of aluminum pole:
Disadvantages of aluminum alloy poles:
Compared to iron poles, aluminum alloy poles have lower strength, but they can reach T6 standards through post-heat treatment.
Because of their numerous advantages and superiority over other materials, aluminum alloy poles are widely used in developed countries such as Europe and America.
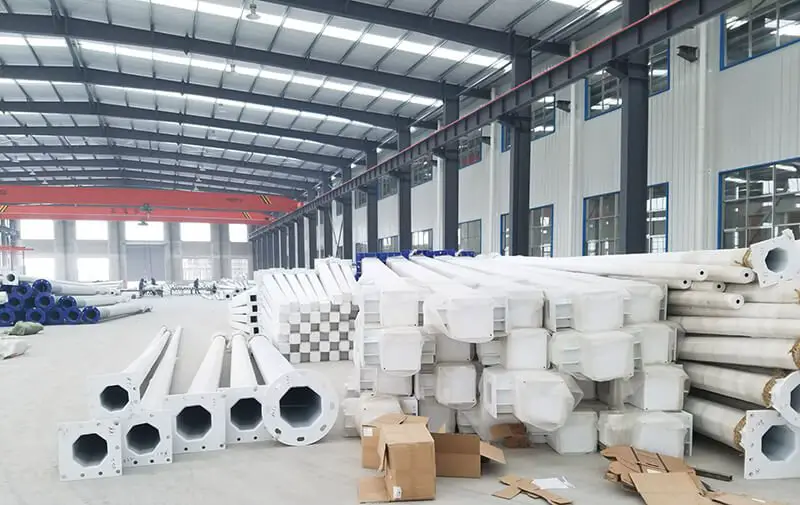
Now that we understand the standards, let’s see how light poles are made!
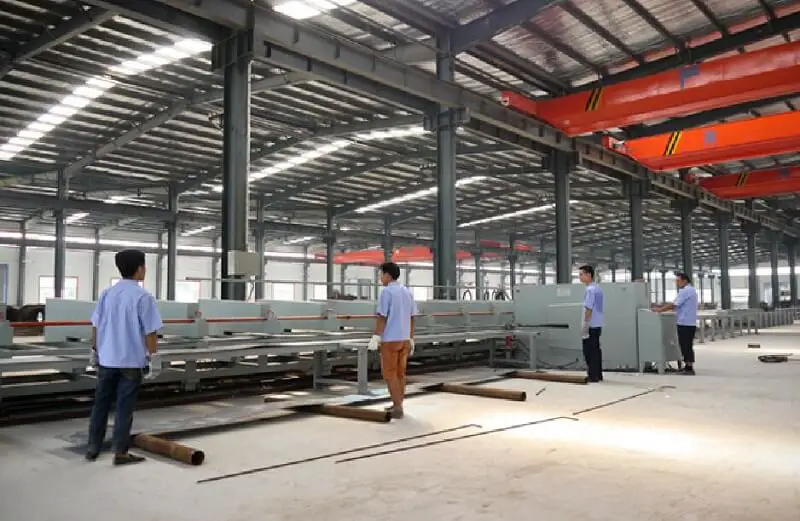
The cutting process involves several automatic plasma cuttings, producing fine incisions with a maximum width of 1mm, creating favorable conditions for subsequent processes.
Before cutting, the slope of the slitter and required cutting size are adjusted. The position of the steel plate is determined to maximize the remaining material that can be used.
The length dimension is ensured during decoiling, and the wide bottom dimension should be no greater than 2mm. The tolerance for the cutting size is positive for each section of the light pole, typically 0-2mm, with a negative tolerance for the small head. After adjusting the size, the cutting is completed using a strip cutting machine and an automatic cutting machine.
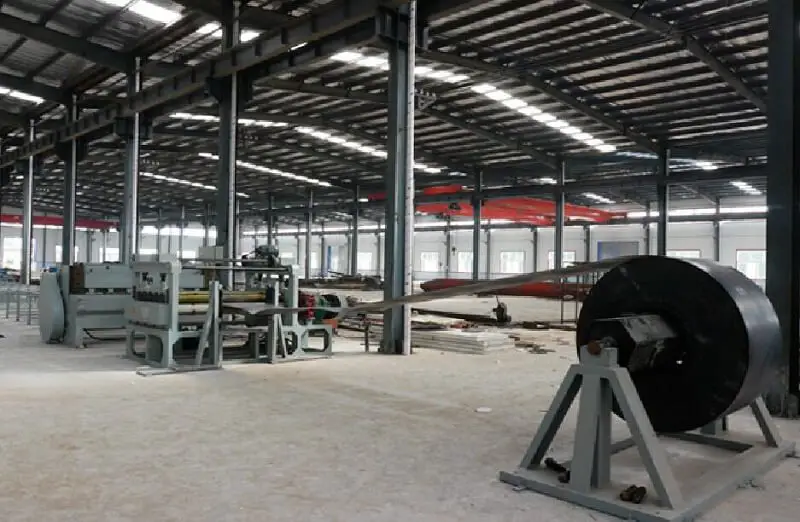
Regarding equipment, it is important to inspect the operation of the rolling shear equipment during material decoiling and to clear any debris from the track to ensure the equipment is in good working condition.

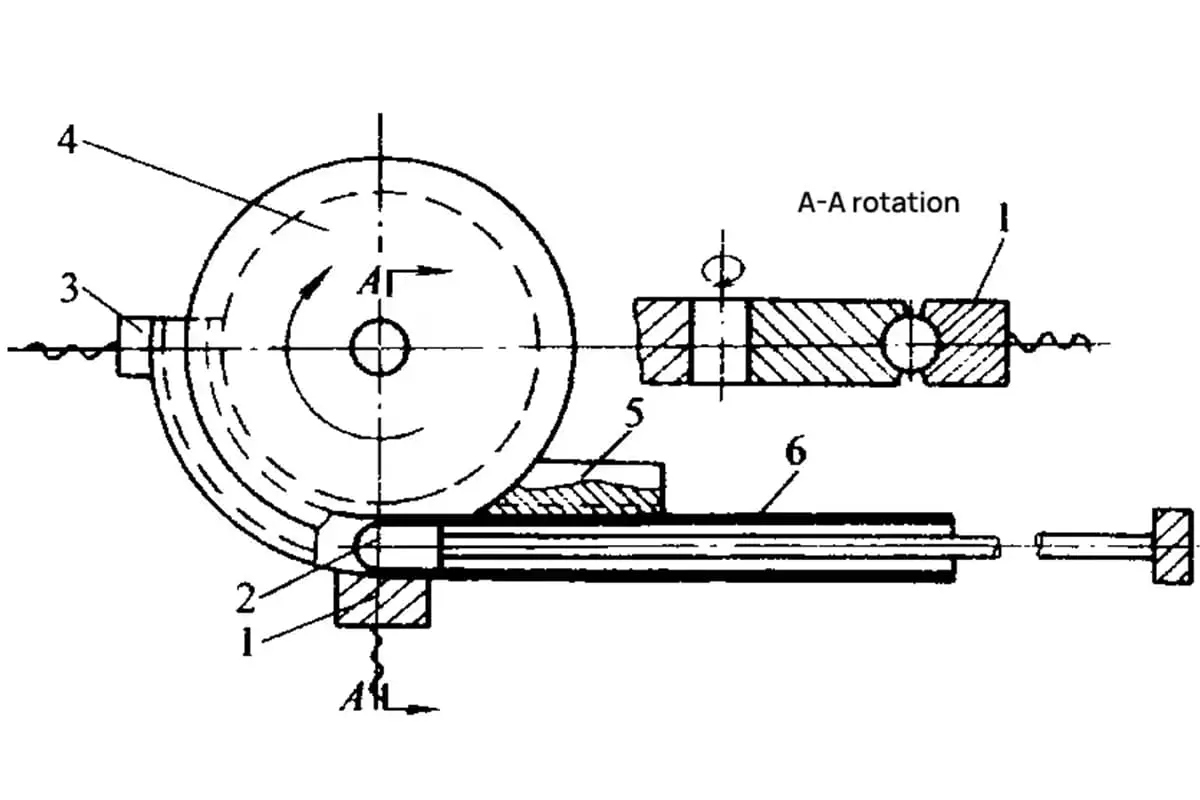
A 12-meter CNC hydraulic press brake is used for forming, with high control precision and a beautiful shape for the lamp pole. The roundness should not exceed 1mm, resulting in a smooth appearance and the ability to form more than 12 meters in one go.
The forming process is a crucial step and must be performed using a CNC hydraulic press brake machine.
Compared to traditional bending machines, the CNC bending machine offers improved accuracy and speed, with the ability to perform automatic avoidance and direct angle calculation.
Therefore, the use of a CNC bending machine is preferred for the forming step whenever possible.
Bending is the most critical step in the production of light poles, as the quality of the bend directly impacts the quality of the light pole and cannot be repaired after bending.
The following points require special attention:
Before bending: Ensure that the sheet is free of slag to prevent crushing the mold during bending.
Check the length, width, and straightness of the sheet, with a straightness requirement of ≤1/1000. If the straightness does not meet the requirement, it should be corrected, especially for polygonal rods which must be straight.
Increase the bending depth of the machine to determine the position of the sheet.
Correctly mark the sheet, with an error tolerance of ≤ ±1mm.
Align the sheet properly and bend accurately to minimize the seam of the pipe, ensuring that the height difference between the two sides is no greater than 5mm.

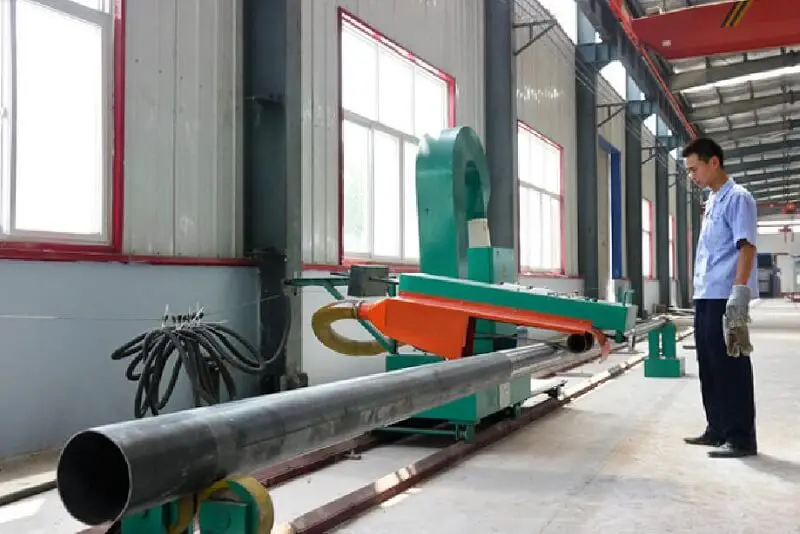
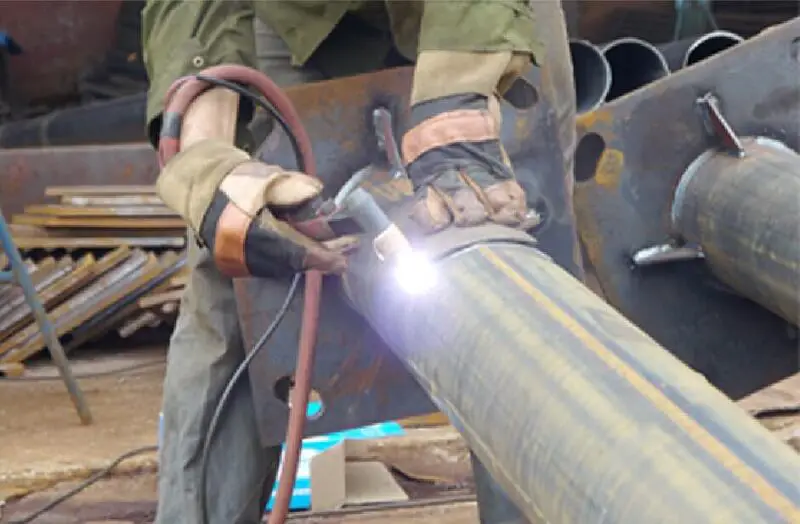
The welding process is performed using a CNC automatic closing machine, resulting in a uniform surface with the welding seam formed in one go.
This device combines closing and welding functions, overcoming the traditional straight weld integrity issues caused by spot welding.
Straight seam welding is performed on the bent pipe seam during the welding process.
As it is an automatic arc welding process, the welder must be diligent in their responsibilities.
When welding, it is important to adjust the welding position to ensure a straight weld.
Repair and grinding involves fixing any defects in the tube blank after automatic welding.
The person responsible for repair should thoroughly inspect each pole and identify any defects that need to be repaired.
Once the repair welding is completed, grinding is performed.
The repaired joint should be similar to the appearance of the automatic weld.

Throughout the production process, shaping occurs twice.
The first time is after the completion of the longitudinal seam welding of the light pole, which helps ensure the accuracy of the welding and consistency in appearance across the batch of light poles.
The second shaping is performed after galvanizing and before spraying to eliminate bending of the light pole caused by thermal stress during hot galvanizing.
The finished product should have a straightness not exceeding 1‰ and a total length difference of no more than 5mm.
The shaping process includes straightening the light pole, rounding both ends of the blank pole, and adjusting the polygonal diagonal dimension.
The general tolerance is <±2mm, and the straightness error of the blank pole should not exceed ≤±1.5/1000.
The end face flattening process involves smoothing both ends of the bent pipe blank to ensure that the nozzle is perpendicular to the center line and there is no unevenness in angle or height.
Following flattening, the end face is polished.
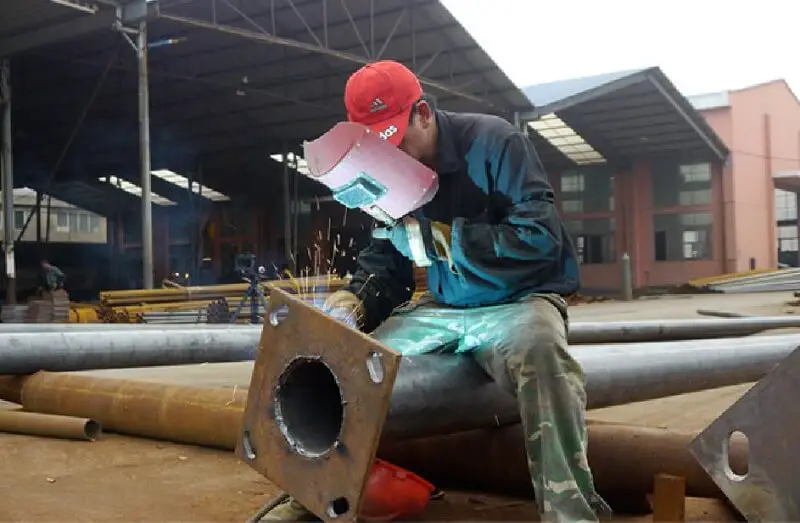
The key to spot welding the bottom flange and rib plate is to ensure that the bottom flange is perpendicular to the straight center line of the lamp post, the rib plate is perpendicular to the bottom flange, and flat with the straight axis of the lamp post.
In this process, both boldness and caution are necessary.
First, the direction of the door must be determined by referring to the drawing, and then positioned according to the specified dimensions.
These dimensions include the up and down, left and right, and door frame size.
Care must be taken during plasma cutting to ensure a straight cutting line, and the door panel and light pole should be welded accordingly.

When welding a 40mm wide door strip, it is important to straighten the 8-10mm projected position, especially when spot welding. The door strip should be close to the light pole and the welding should be secure.
The welding of the electrical strip and lock base is determined according to the drawing.
The lock base should be welded in the middle of the door with an error tolerance of ≤ ±2mm, and should be level and not exceed the height of the light pole.
The bend fork process shares the same characteristics as the door opening process and requires both boldness and caution.
Firstly, attention should be paid to the direction of the door, secondly to the starting point, thirdly to the angle of the fork, and the traction speed.
Avoid flickering to ensure a 100% yield.
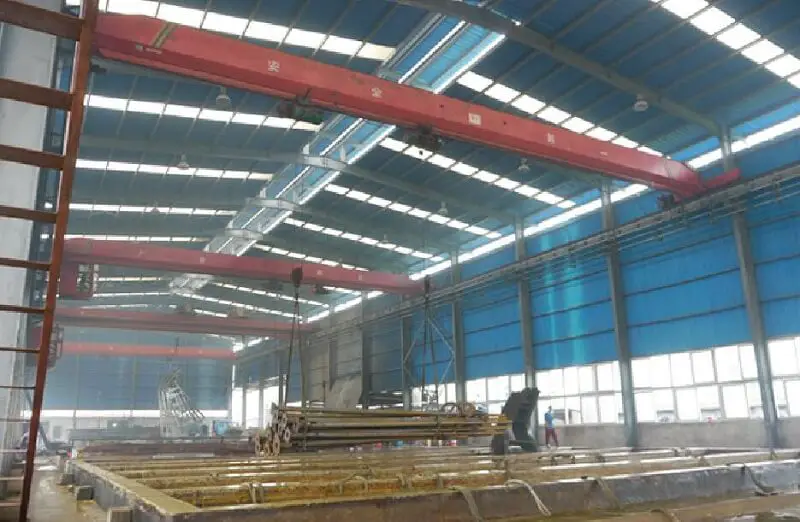
The quality of the galvanizing has a direct impact on the quality of the light pole.
After galvanizing, the surface should be smooth and uniform in color.
There should be no sagging. If a light pole has significant sagging, it must be re-galvanized.
Inspection before galvanizing
Before galvanizing, the surface of the light pole is thoroughly checked for paint or welding residue, and if present, it should be cleaned.
The surface of the light pole must undergo necessary degreasing treatment.
It should be immersed in the degreasing solution for 15-30 minutes to remove oil, and then cleaned in the washing pool more than two times.
The surface of the light pole should be cleaned of the oxide layer.
It should be immersed in hydrochloric acid for 20-40 minutes to remove the oxide layer.
If there is a localized oxide layer on the surface, it should be treated with a tool and then pickled for 15 minutes.
After pickling, the acid ions on the surface of the light pole must be removed in the cleaning tank, and it should be cleaned more than two times.
Zinc additive
Once the cleaning of the light pole is completed, it should undergo zinc treatment in the zinc-assisting bath, with the temperature controlled at 60-70°C for 3 minutes.
The zinc-assisting ingredients should be analyzed every 4 hours.
Galvanizing
After being cooled with water, to prevent white rust (zinc oxide) from forming on the galvanized surface, a chromic acid treatment must be applied to the galvanized surface.
This will result in a yellow passivation liquid on the surface, which will naturally fade after exposure to rain.
The purpose of spraying is to be beautiful and to prevent corrosion.
Polishing
The surface of the galvanized rod should be polished with a polishing wheel to ensure that the surface of the light rod is smooth and flat.
Straighten
The polished light pole should be straightened and have its mouth shape formed. The straightness of the light pole must be 1/1000.
The caliber requirements are: small rod ≤ ± 1mm; high rod ≤ ± 2mm.
The following process requirements must be followed:
(1) Adhere strictly to the requirements of the plastic spraying process after galvanizing.
A spray technology should be applied to the rod body prior to spraying to increase adhesion without damaging the hot-dip galvanized layer.
(2) Strictly control the curing time and temperature to ensure that the plastic layer is uniform, smooth, and free of pores.
(1) The power distribution door is cut by a CNC plasma cutting machine, which offers high accuracy and precise cutting, and is integrated with the rod body.
(2) There is a grounding device and grounding wire inside the pole door.
After galvanizing all the door panels, the processing includes hanging zinc, leak-proof zinc, and storing zinc in the keyhole.
When drilling the screw holes, the electric drill must be perpendicular to the door panel, with equal gaps around the door panel, and the door panel must be flat.
After the screws are fixed, the door panel should not be loose and the stand must be sturdy to prevent it from falling off during transportation.
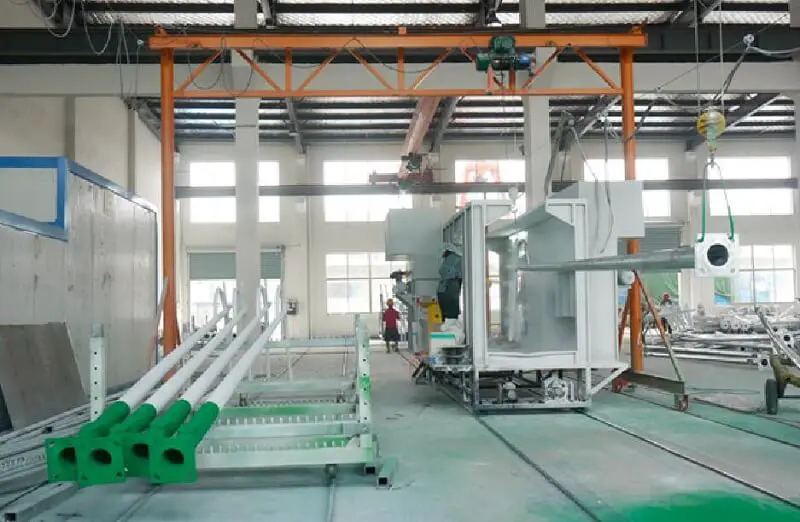
Plastic spray powder: The light pole with the door is placed in the spray room, and the plastic powder color is sprayed according to the production plan. Then, it is transferred to the drying room. The temperature and holding time of the drying room must be strictly in accordance with the requirements of the plastic powder to ensure requirements such as powder adhesion and finish are met.

The production process of street light poles is as follows:
Factory inspections are conducted by quality inspectors who inspect each item one by one according to the items tested for the light poles. The inspectors must record and archive their findings at the same time.
This is the production process of light poles. Have you gained a new understanding of street light poles?
Finally, I would like to remind you that when choosing a light pole for street lighting, it is important to consider the specific conditions of the location. Different positions may require light poles with different specifications, with the goal of achieving the most efficient lighting while minimizing costs.
If you want to buy the equipment to build a light pole production line, please free free to contact us to get a quote.

As the founder of MachineMFG, I have dedicated over a decade of my career to the metalworking industry. My extensive experience has allowed me to become an expert in the fields of sheet metal fabrication, machining, mechanical engineering, and machine tools for metals. I am constantly thinking, reading, and writing about these subjects, constantly striving to stay at the forefront of my field. Let my knowledge and expertise be an asset to your business.